There’s something undeniably heartwarming about the spicy aroma of gingerbread filling your home during the festive period. It’s cosy, nostalgic, and the perfect Christmas indulgence.

At Herdy, we’ve had our fair share of fun with gingerbread in the past, from biscuits with 'Muddy Boots' to 'Christmas Tree Decorations'. This year, we’re stepping things up with a ginger and dark chocolate recipe that’s as easy to make as it is delicious. These ginger ‘peep’ biscuits are sure to bring smiles all around.
Ingredients
- 16 oz plain flour
- ¼ tsp bicarbonate of soda
- 5 tsp ground ginger
- 2 tsp ground cinnamon
- 6 oz butter
- 6 oz soft brown sugar
- 6 tbsp golden syrup
- 250g dark chocolate
Details
- Prep Time: 30 minutes
- Cooking Time: 15 minutes
- Makes: Approx. 24 cookies
- Difficulty: Easy/Medium
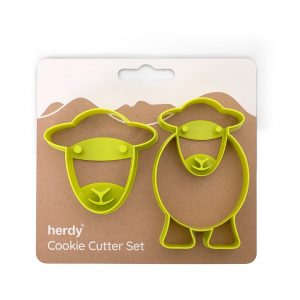
- Ewe’ll Need: Herdy Cookie Cutter Set
Method
1. Prepare the Wet Ingredients
In a pan, gently melt the butter, sugar, and golden syrup over low heat until they combine into a smooth mixture. Be careful not to overheat.
2. Mix the Dry Ingredients
In a large bowl, sieve together the flour, bicarbonate of soda, ground ginger, and cinnamon. Give it a good stir to ensure everything is evenly mixed.


3. Combine
Pour the melted butter mixture into the bowl of dry ingredients. Mix thoroughly until a dough forms. It should be soft but firm enough to roll.
4. Roll and Shape
Once the dough is cool enough to handle, roll it out on a lightly floured surface to about 7mm thickness. Use the smaller cutter from your Herdy Cookie Cutter Set to create adorable gingerbread Herdy shapes.


5. Bake
Carefully place your cookies on a non-stick baking sheet or line with parchment paper. Bake at 160°C for 15 minutes or until they’re golden and firm to the touch. Let them cool completely on a wire rack.
6. Melt the Chocolate
Break the dark chocolate into small pieces and melt using a bain-marie or microwave. If using the bain-marie method, place the chocolate in a heatproof bowl over a pan of simmering water. Stir gently until fully melted, ensuring no water gets into the chocolate.


7. Create the ‘Peep’ Effect
Dip each gingerbread Herdy head into the melted chocolate, stopping just below the eyes. This gives the playful effect of Herdy ‘peeping’ over a chocolatey layer. Place the biscuits on parchment paper and allow the chocolate to fully set.
Share the Joy
Your Herdy ginger ‘peep’ biscuits are now ready to enjoy. Share them with friends and family, pair them with a warm cuppa or hot chocolate, or package them up as thoughtful homemade gifts.
Featured Product
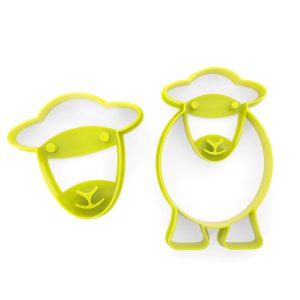
Cookie Cutter Set
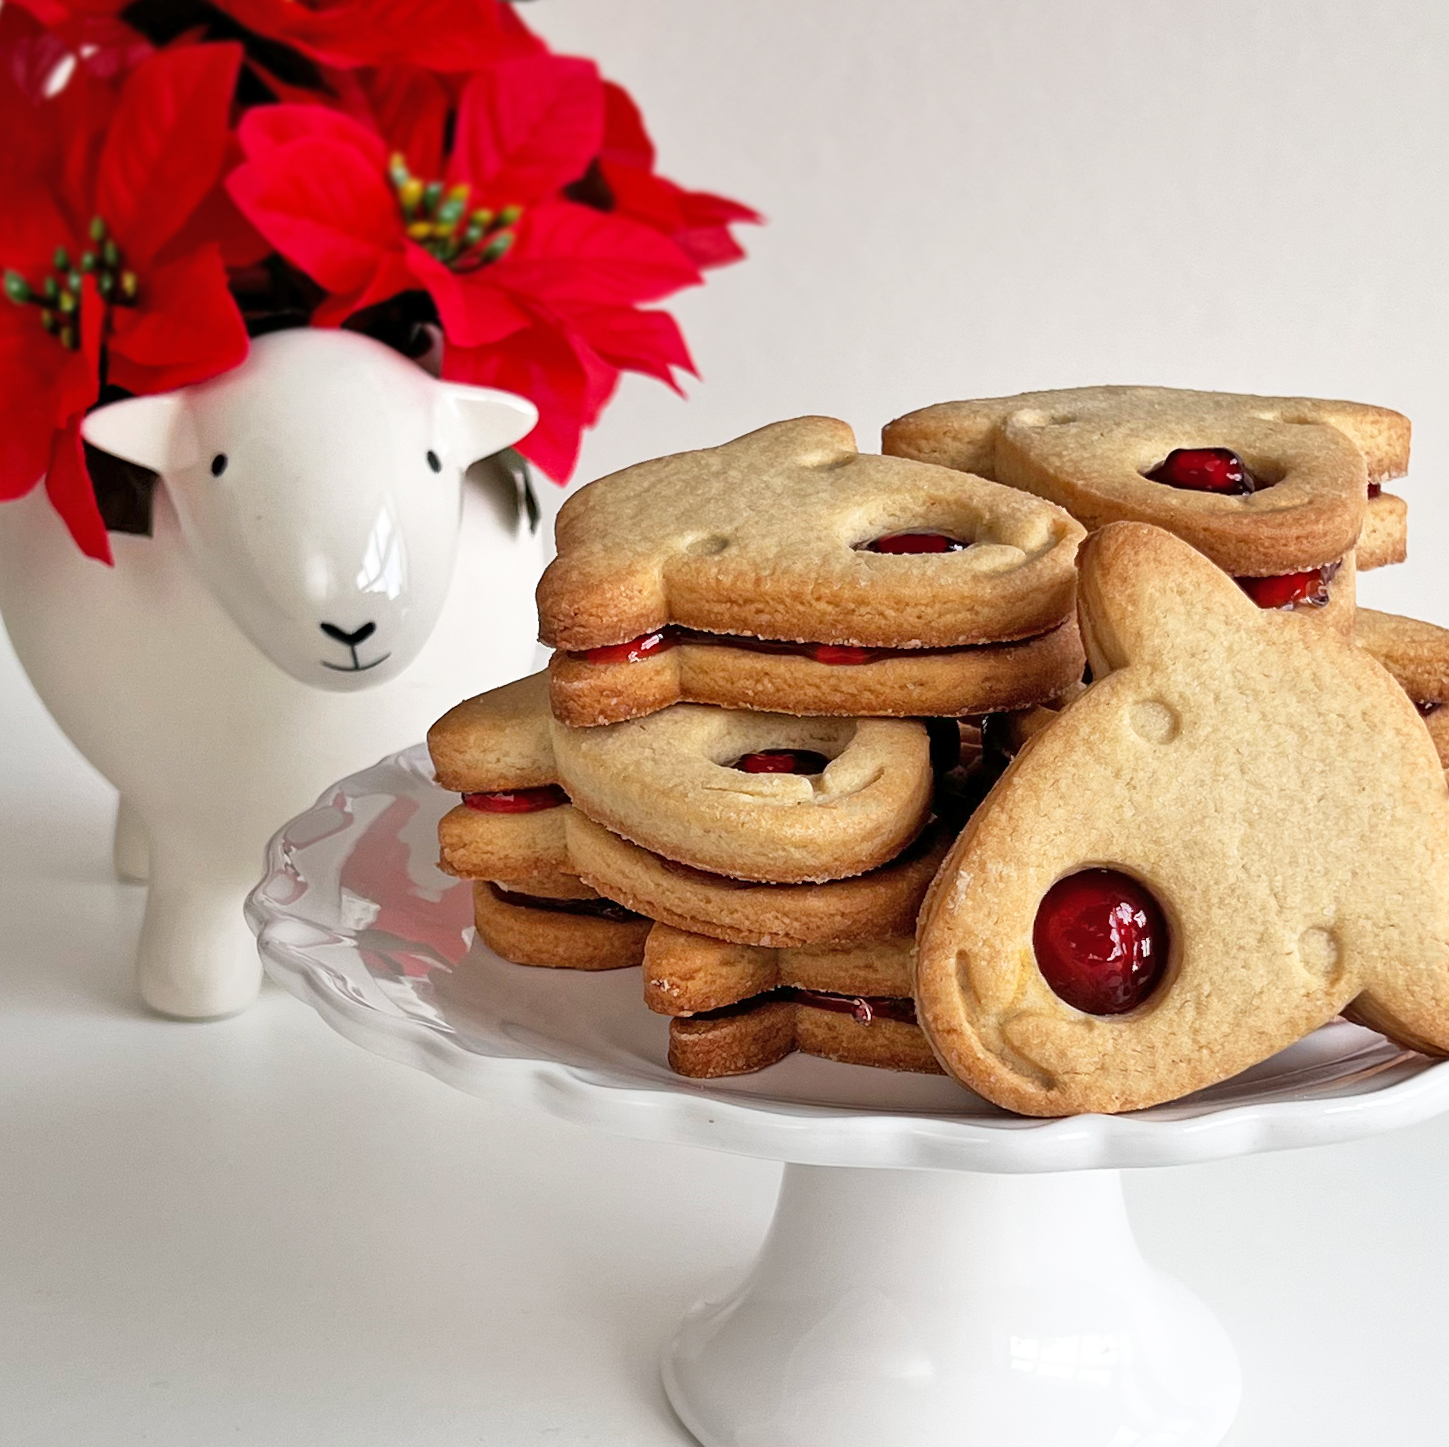
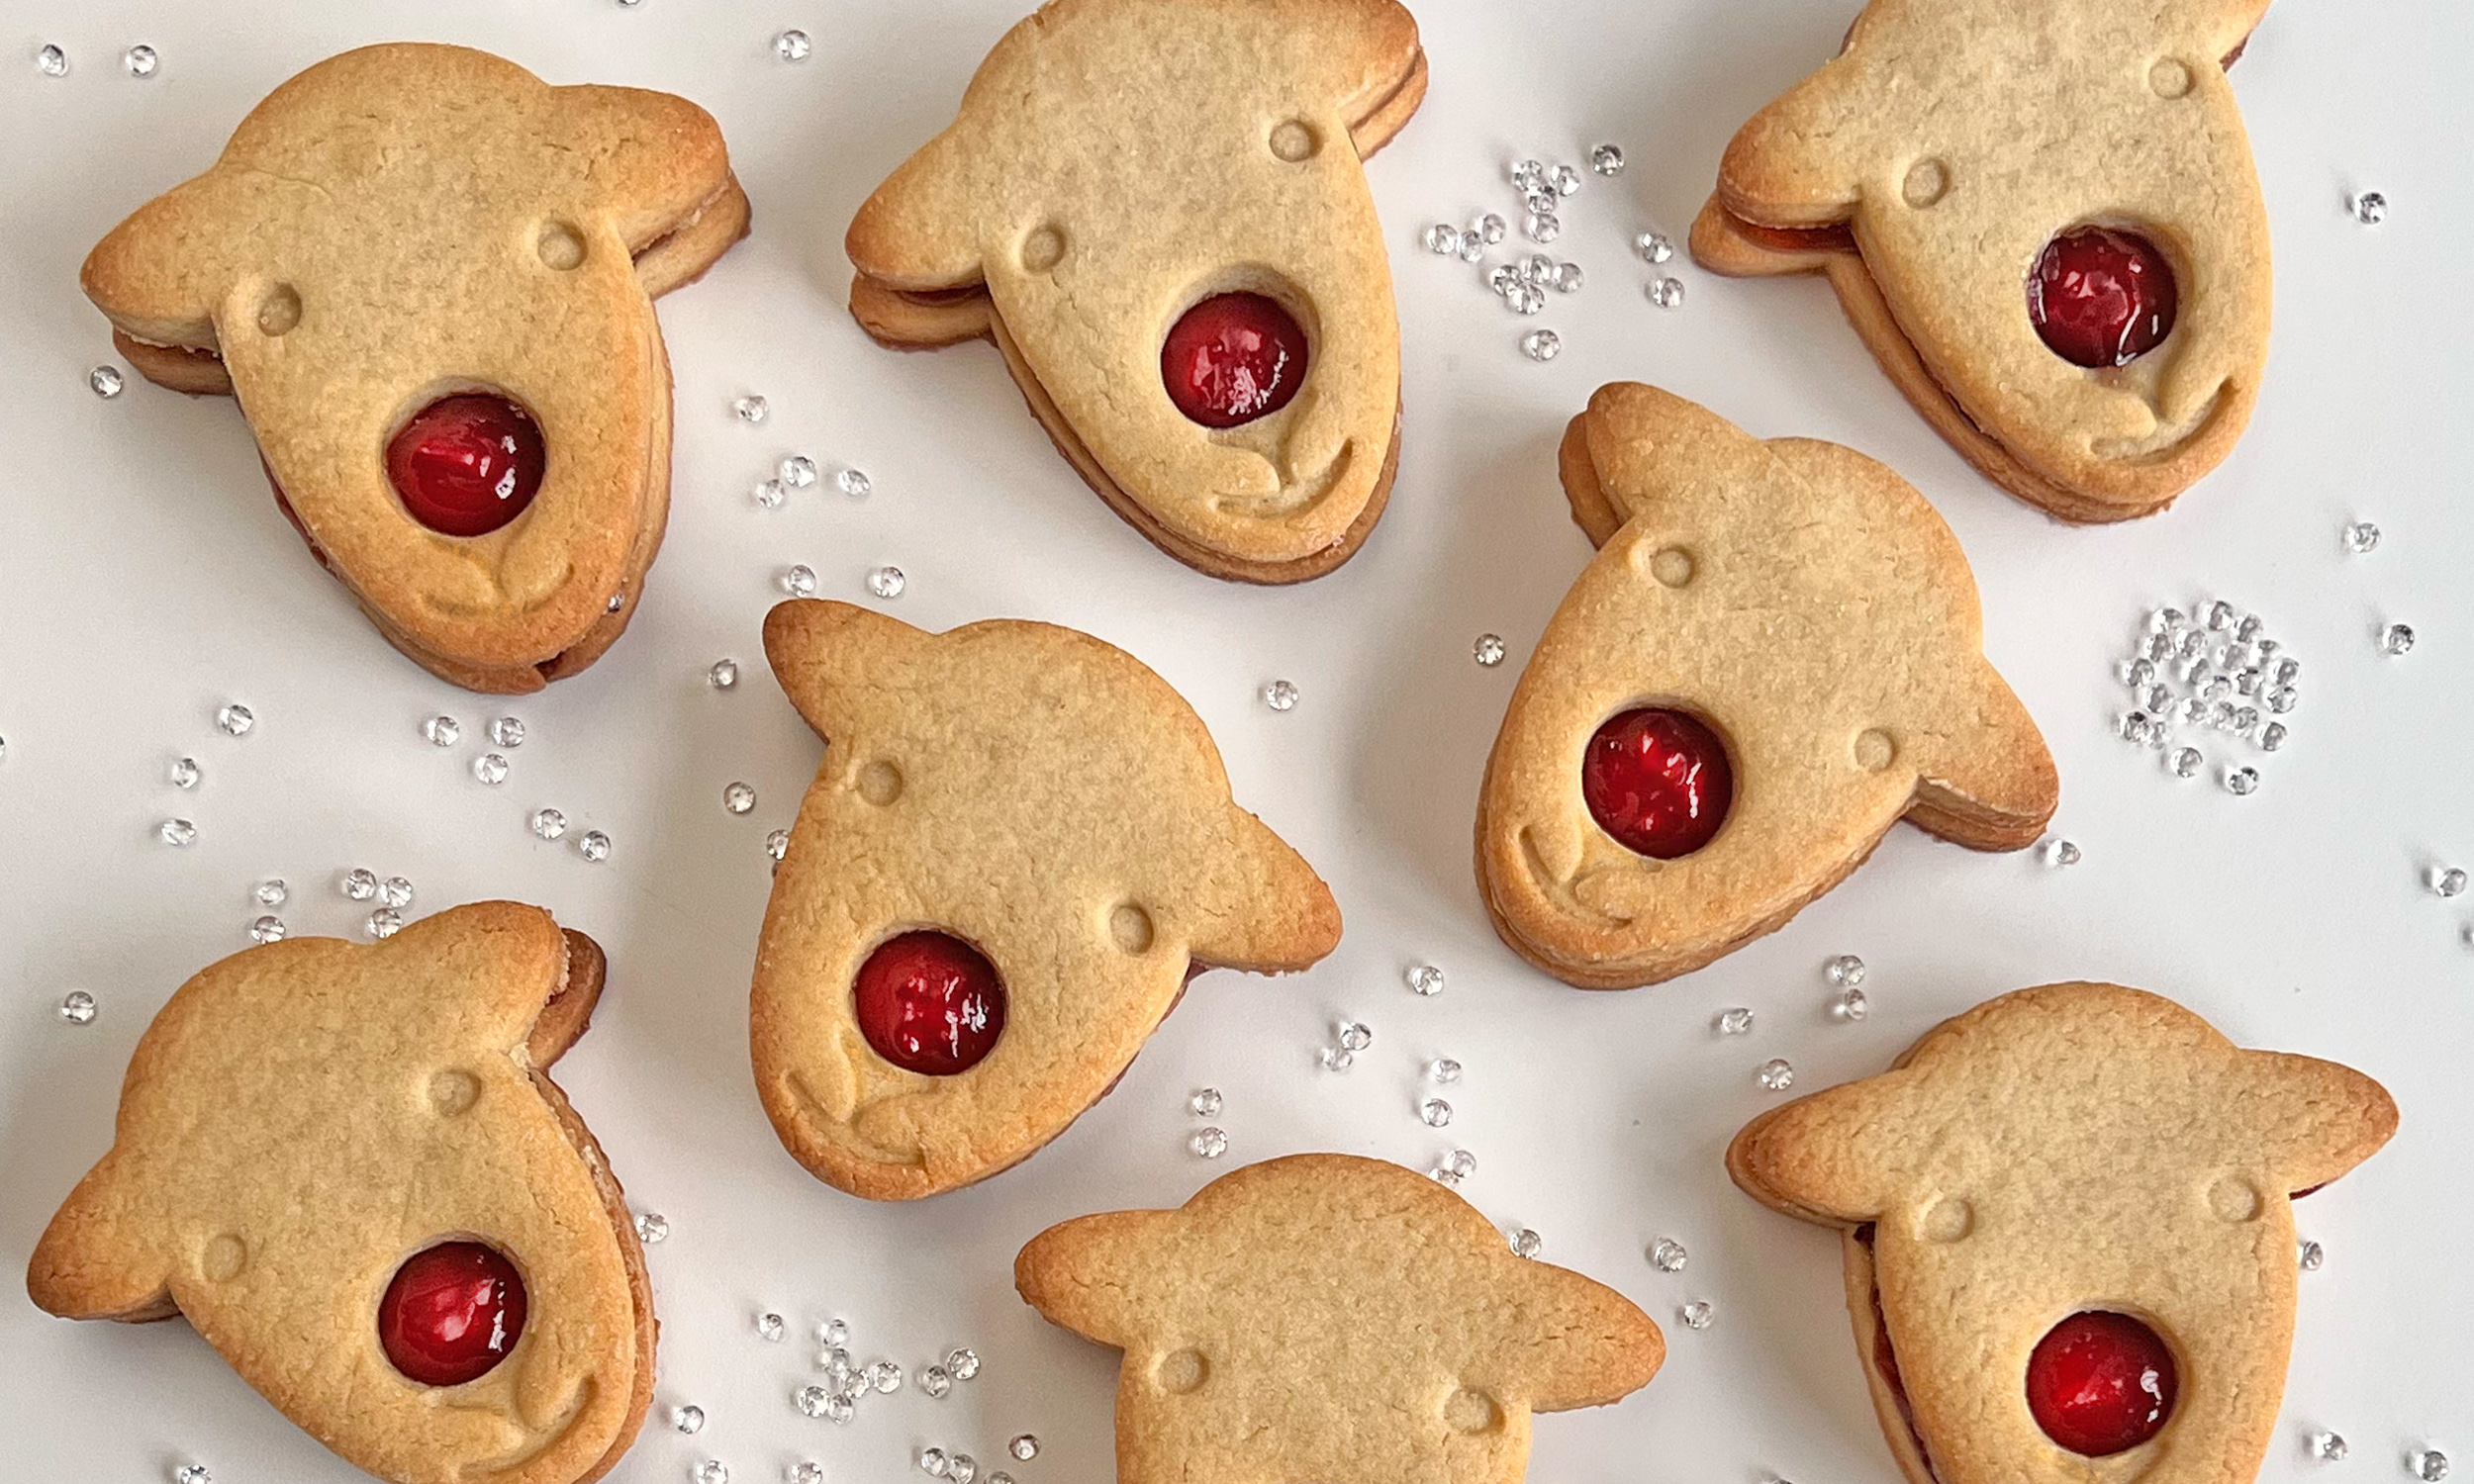
Get ready to spread some Christmas cheer with Herdy’s fun and festive cookies, inspired by everyone's favourite red-nosed reindeer. These buttery, jam-filled treats are super simple to make and add a festive twist to the classic ‘Dodger’. Gather your flock and create some cute Herdy smiles with red noses — perfect for sharing or gifting this Christmas!
Ingredients
- 170g butter, softened
- 150g sugar
- 1 large egg
- 1 tsp vanilla extract
- 325g all-purpose flour (plus extra for dusting)
- Strawberry jam
What Ewe’ll Need
- Herdy Cookie Cutter Set
- Mixing bowl
- Sieve
- Rolling pin
- Palette knife/spatula
- 1.5cm circular cutter
Details
- Prep Time: 30 minutes
- Cooking Time: 10 minutes
- Makes: Approx. 12 cookies
- Difficulty: Easy
Method
Step 1: Get Mixing
In a large bowl, mix together the butter and sugar until creamy. Be gentle — overmixing can make the cookies spread too much when baking.
Step 2: Make the Dough
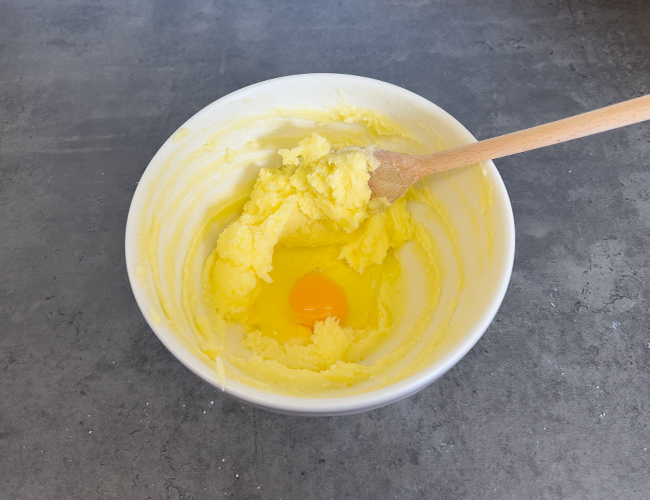
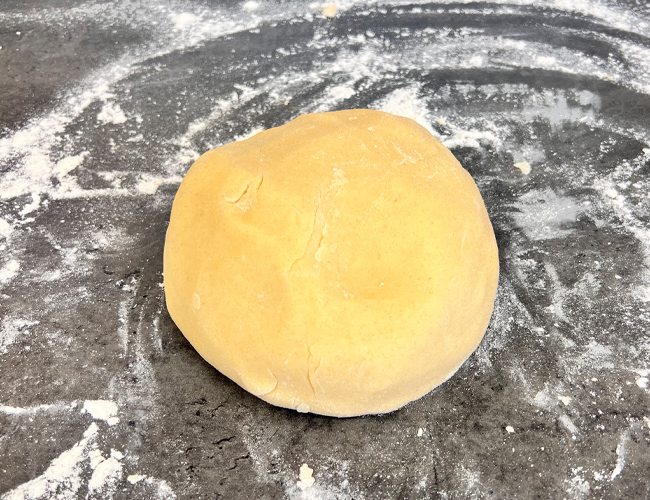
Beat the egg into the butter-sugar mixture. Sift in the flour, add vanilla extract, and mix until a dough forms. Knead lightly on a floured surface, then chill the dough in the fridge for 30 minutes.
Step 3: Roll and Cut
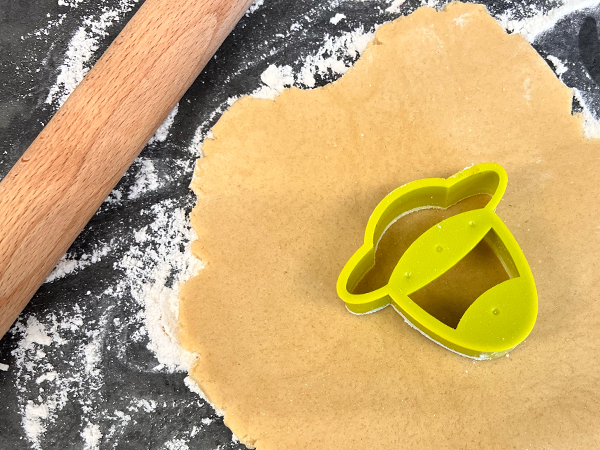
Preheat your oven to 200°C (Gas Mark 5). Roll out the chilled dough to about 6mm thick. Use the smaller Herdy cookie cutter to cut out your shapes. Re-roll scraps to avoid waste! (Tip: Flour Herdy’s smile to prevent sticking.)
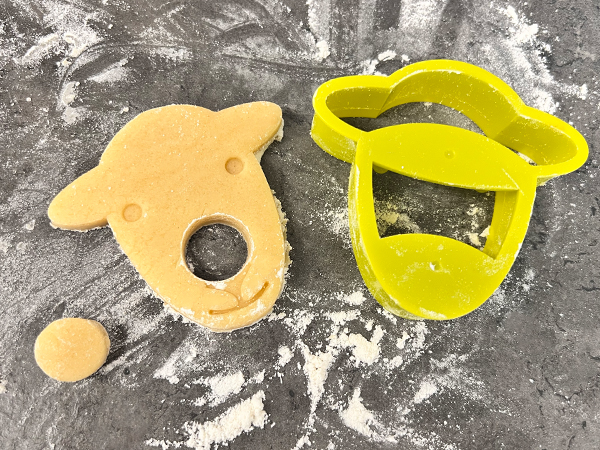
Step 4: Create the Nose
For half of the cookies, use a 1.5cm circular cutter (or bottle lid) to cut out a nose just above Herdy’s smile. Add any excess dough back into the mix. Carefully transfer all cookies to a non-stick baking tray or silicone mat.
Step 5: Bake
Bake for about 10 minutes, until the edges are lightly golden. Cool completely on a wire rack before moving to the next step.
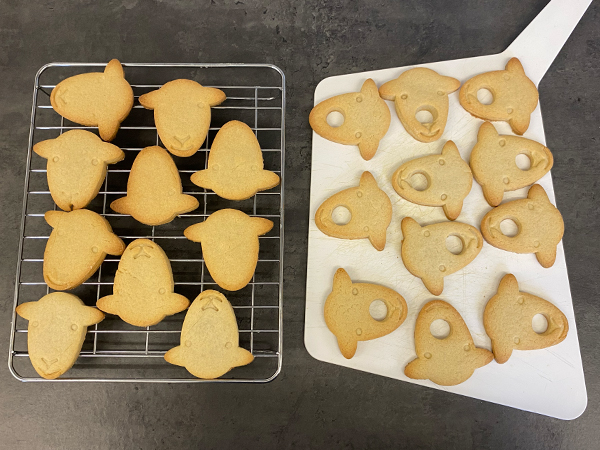
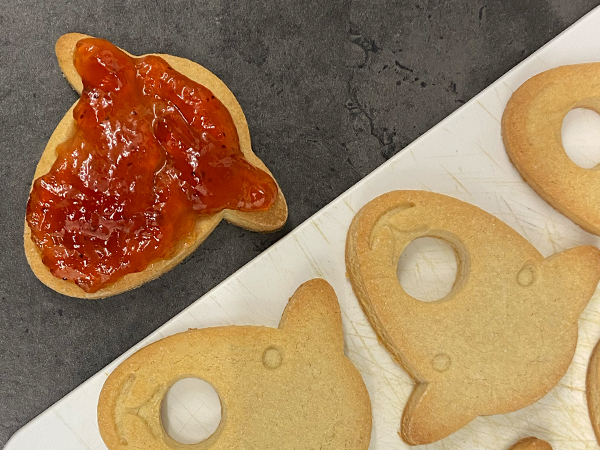
Step 6: Add the Jam
Spread a generous teaspoon of strawberry jam onto each cookie without a nose cut-out. Make sure to get Herdy’s ears, too! Place a cookie with a nose cut-out on top, pressing gently. Pop them in the fridge to set the jam.
Add a c-ewe-t twist to your Christmas Cakes this festive season.
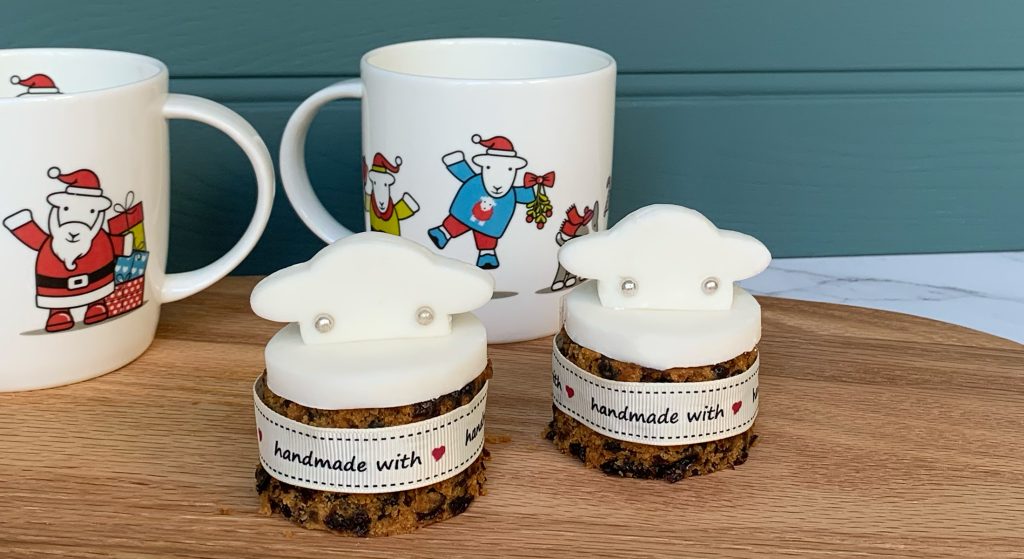
With only a few weeks left until the big day, it’s time to start thinking about those tasty treats you and the family can enjoy this Christmas. Herdy’s mini ‘Peep’ Christmas cakes are the perfect addition to your festive menu, they look baa-riliant and are super easy to make.
This year, ewe can have a Herdy Christmas, even if baking isn’t really your thing!
Ewe will need
- Fruit Cake / Loaf
- Ready to roll Royal Icing
- Silver Edible Pearls
- Decorative Ribbon (optional)
- Herdy Cookie Cutter Set
- Icing Sugar
Method
1 - Take your pre-bought or homemade Christmas cake and cut it into individual cakes. We used a 7cm circular cutter to create our mini cakes. We also gave the cakes a trim so they were all the same height, approximately 7cm. These sizes are only a guide, you could make your cakes a different size, depending on what baking equipment you have in your cupboard.
2 - Set your mini Christmas cakes to one side. Next, it’s time to prepare the Royal Icing.


3 - Royal out half your Royal icing to approximately 5mm thick. Make sure you roll out the icing on a surface dusted with Icing Sugar to stop your icing from sticking. Use a guide if you have one to create an even roll.
4 - Take the large Herdy cookie cutter and cut the desired shape from the icing, you will only need to use the top ‘head’ part of the cutter.


5 - Cut Herdy’s head a couple of millimetres below the eyes, this will create the ‘Peep’ design
6 - Place two edible silver pearl decorations for Herdy’s eyes. Apply a little pressure to each pearl to secure them in place.


7 - Take the remainder of your Royal icing and roll to the same thickness as your ‘Peep’ cutouts. Use the same cutter used for the cakes to create a disk of icing to sit on top.
Top Tip: Use some festive flavoured jam to secure the icing disk to the cake base.
8 - Finally, carefully place your Herdy ‘Peep’ cut out on top of your royal icing disk. To make our cakes extra festive, we wrapped a ribbon around each of our cakes. Ewe could try some edible glitter of a sprig of Holly.


Featured products
Get ready for Halloween with Herdy’s spooktac-ewe-lar Chocolate Mummy Cookies!
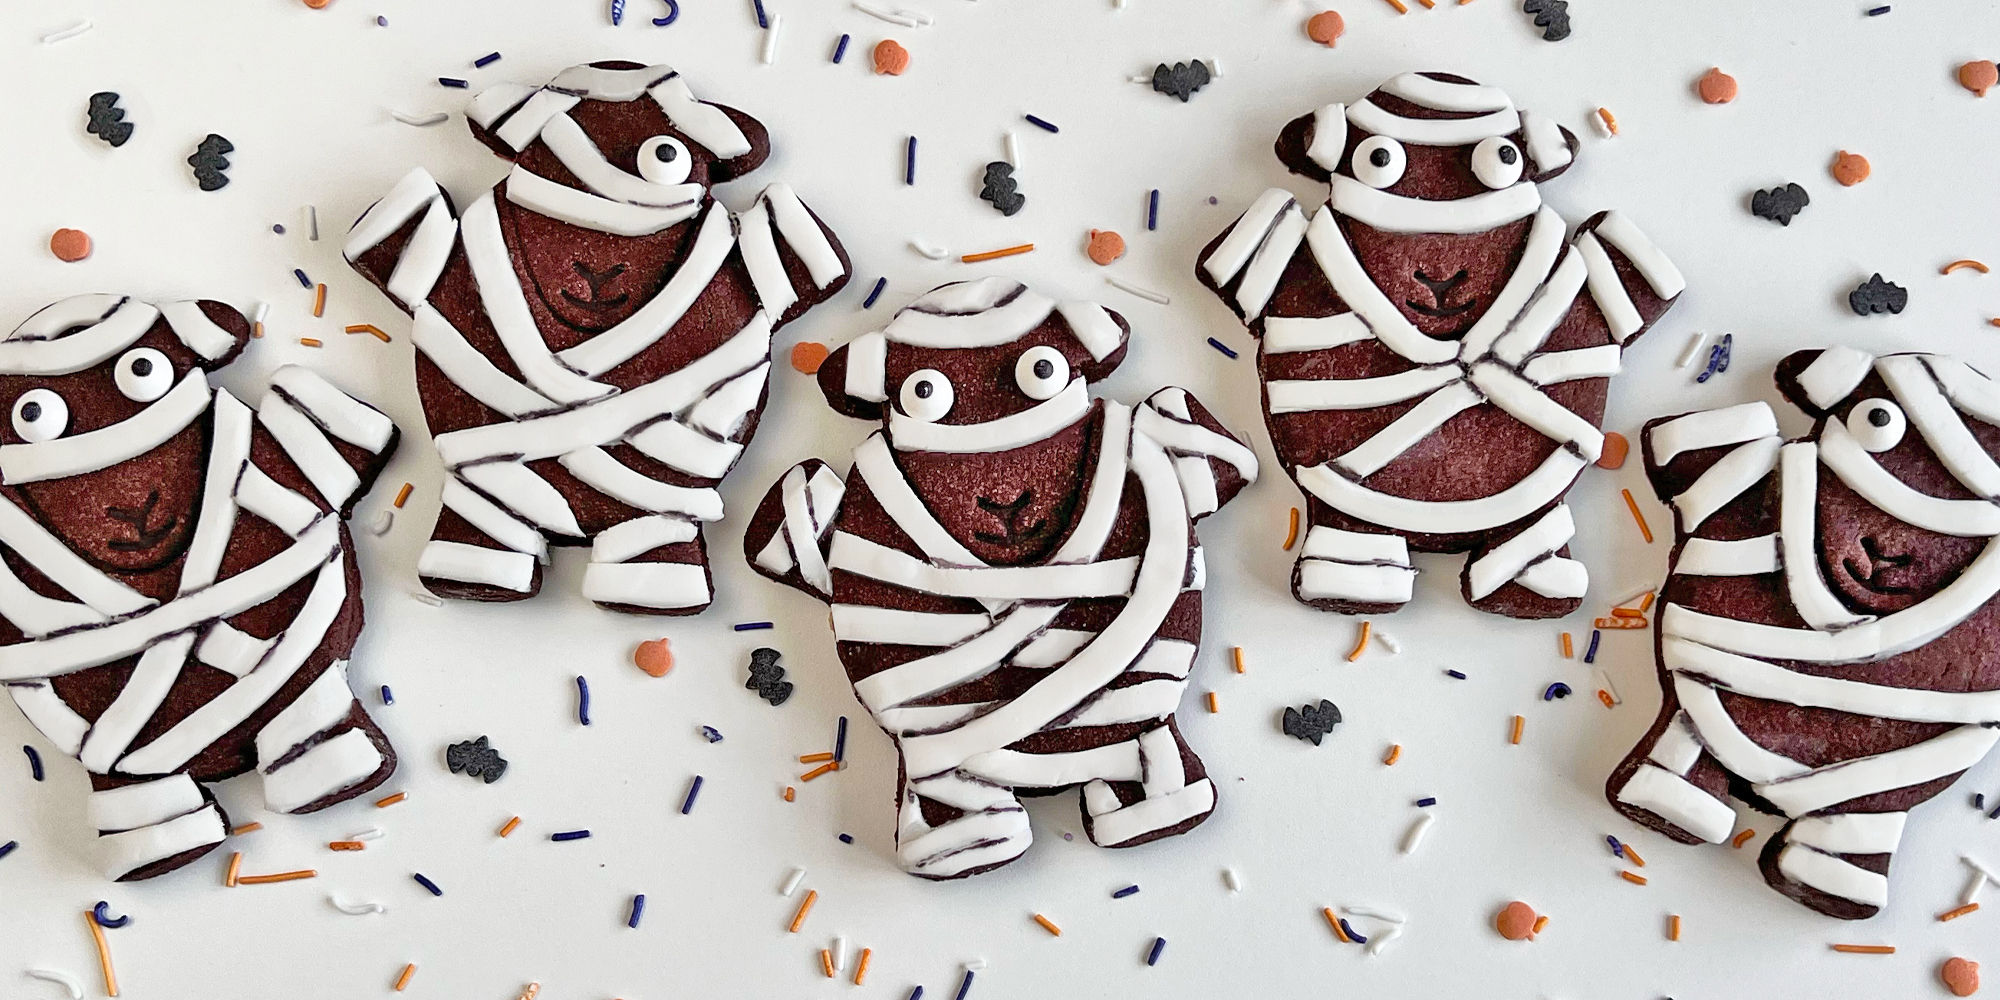
These chocolatey treats are not just delicious, they're a baa-rilliant twist on traditional Halloween cookies. Perfect for kids, trick or treating, or parties, these cookies will have everyone screaming... with delight! So grab your Herdy Cookie Cutter and let's make some sheepishly spooky snacks that'll have ewe flocking for more.
- Makes 10 Cookies
- Takes Approximately 1 Hour (plus chilling time)
- Difficulty Rating: Medium
Ingredients
Cookie
- 200g Unsalted Butter
- 110g Caster Sugar
- 1 tsp Vanilla Extract
- 280g Plain Flour
- 50g Cocoa Powder
- 4 tbsp milk
Decoration
- 500g ready to roll Royal Icing
- Icing Sugar
- Googly Eyes (optional)
- Edible Ink Pen (optional)
Method
1 - In a large mixing bowl, cream together the softened butter and caster sugar until smooth and creamy, using a wooden spoon.
2 - Gradually sieve in the flour and cocoa powder along with the vanilla extract. As you begin to bring your ingredients together, add the milk to ensure a smooth dough. Use your hands to finish combining the mixture.
3 - Wrap the dough in cling film and pop in the fridge for 30 minutes to allow it to firm up, this will help your biscuits keep their shape while baking.


4 - Preheat your oven to 180°C (350°F) or gas mark 4.
5 - Roll out your dough to approximately 7mm thick on a well-floured surface. Using the larger Herdy cookie cutter, cut out as many biscuits as you can, we made 10. Place them on a non-stick baking tray or line your tray with parchment paper, leaving space between each cookie.
6 - To give your Mummy cookies arms, use Herdys feet shapes from the cookie cutter. To attach the arms to the bodies, use a little bit of pressure to secure them in place and carefully smooth over the joint.


TOP TIP: To make sure your biscuits keep Herdy's famous smile, be sure to flour your cookie cutter well.
7 - Bake for 10-12 minutes then remove from the oven and allow to fully cool on a wire rack.
8 - As the biscuits are cooking, roll out your Royal Icing to approximately 2mm thick on a plastic chopping board, make sure the surface is covered with a good amount of icing sugar to prevent sticking.


9 - Using a sharp knife, cut strips of icing around 4mm in width, don't worry if your lines are a bit wonky, this will help add to the effect.
TOP TIP: If one (or two) of Herdys arms fall off during baking, use a little bit of icing sugar and water as a glue to reattach.
10 - Once your biscuits are fully cooled, you can start applying your strips of royal icing (bandages). To attach the strips, mix together 2 heaped teaspoons of icing sugar with a splash of water to create a paste, this will act as your glue. Using a paint brush (or carefully dunking) apply a thin coat to one side of your icing strip, then lay your strip onto your cookie. Be creative with your design and be sure to attach strips to all Herdy’s body parts to achieve the full effect. Use a sharp knife to trim the strips to the size you need.


Optional: Use a black edible pen to add shadow to your icing bandages.
11 - Allow your cookies to sit for 30 mins or until the icing sugar mixture has dried. Finally, you can add edible googly eyes to your cookies to make them extra spooky! Use a little of your icing sugar mix to secure in place.
Related products
Hands up who loves a Bourbon Biscuit! They’re an irresistibly tasty treat and Ideal for dunking.
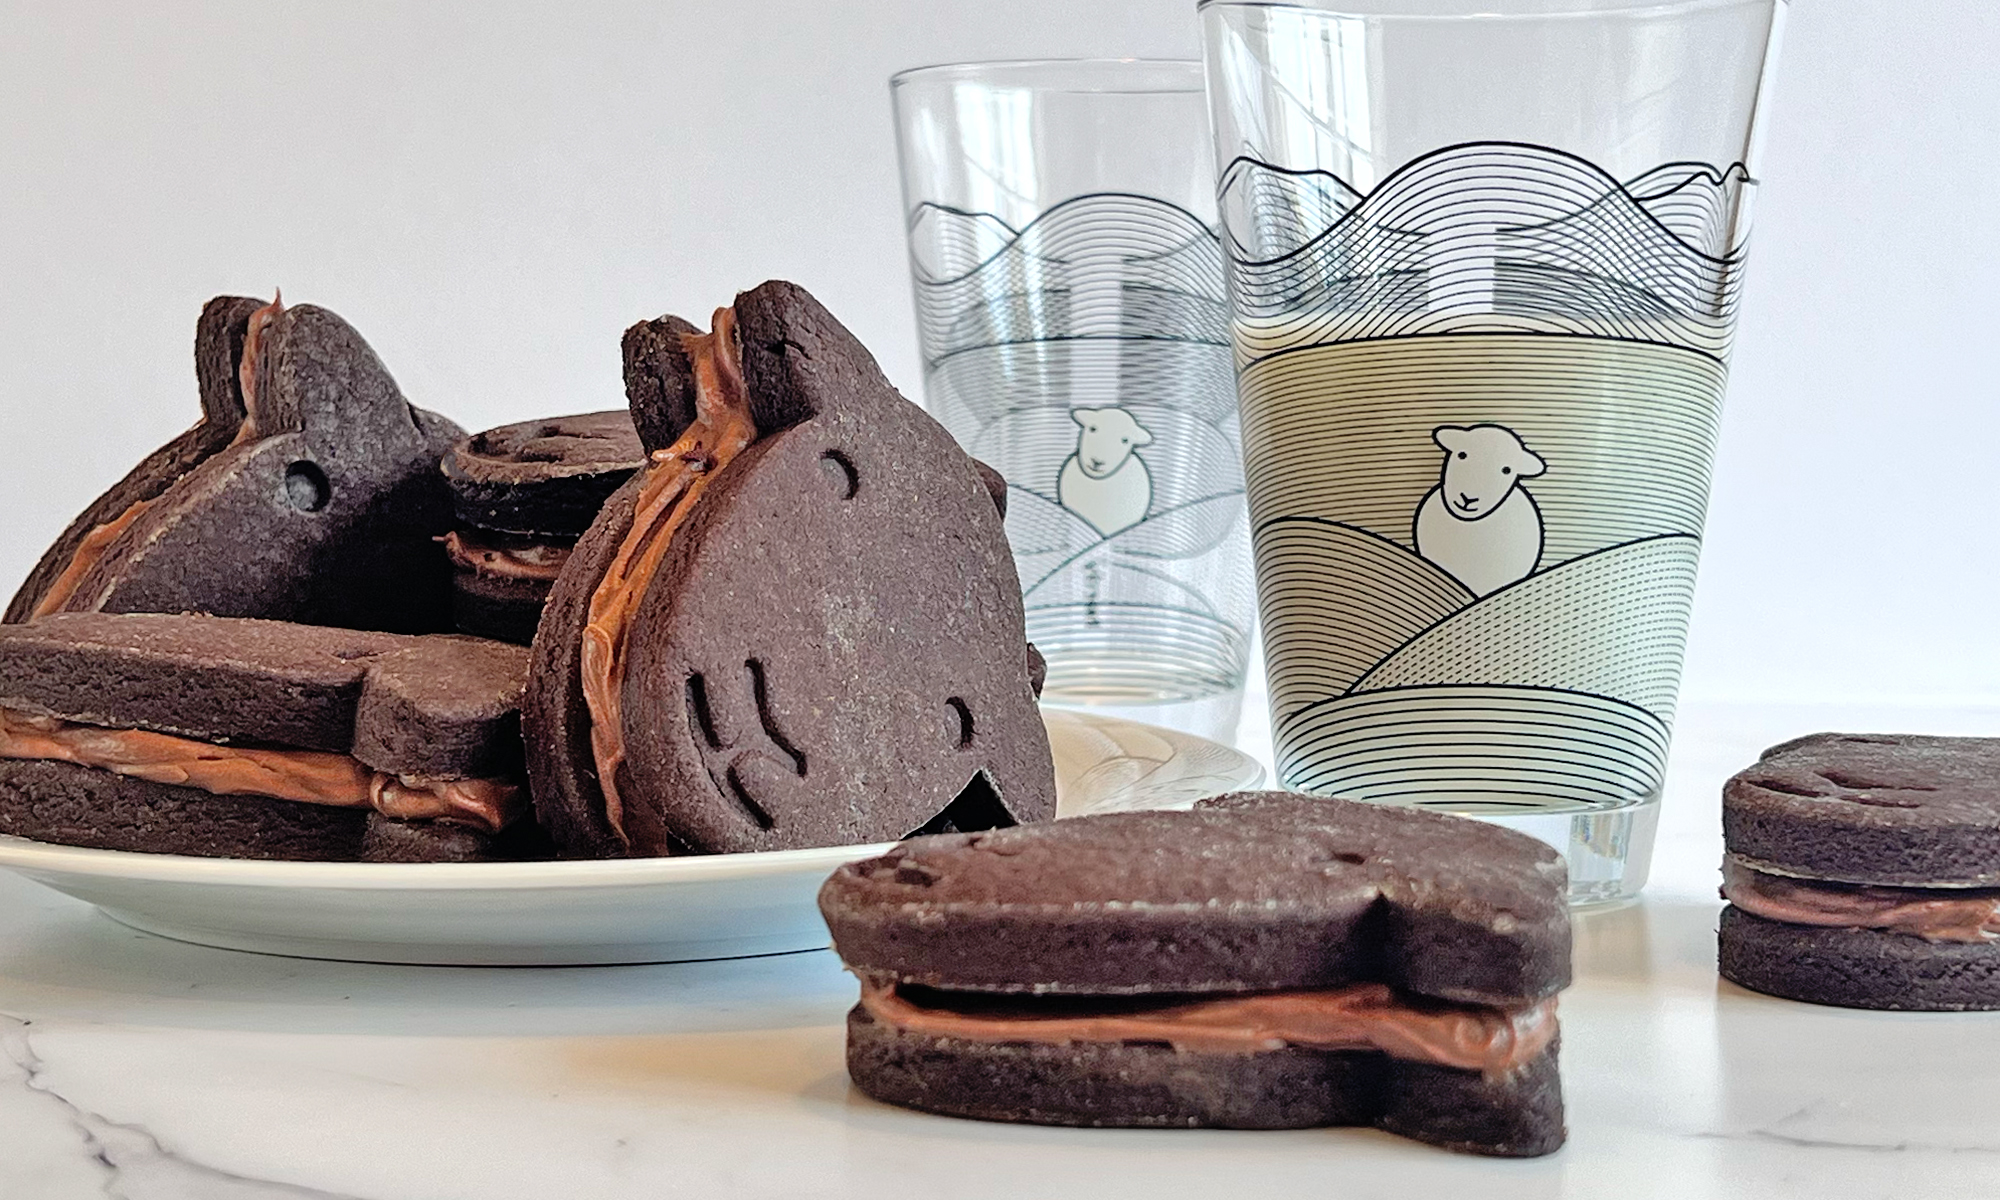
Treat yourself to some nostalgic chocolate treats with Herdy’s easy-to-follow recipe.
With a creamy chocolate filling sandwiched between two buttery biscuits, these tasty treats are guaranteed to make ewe smile.
- Makes 10 sandwiches
- Takes approximately 45 minutes (plus chilling time)
- Rating, easy
Ingredients
Biscuit
- 200 g unsalted butter
- 110 g caster sugar
- 1 tsp vanilla extract
- 280 g plain flour
- 50 g cocoa powder
- 4 tbsp milk
Filling
- 180g unsalted butter
- 360g icing sugar
- 5 tbsp cocoa powder
- ½ tsp vanilla extract
Method
1 - In a large mixing bowl, cream together the softened butter and caster sugar until smooth and creamy, using a wooden spoon.
2 - Gradually sieve in the flour and cocoa powder along with the vanilla extract. As you begin to bring your ingredients together, add the milk to ensure a smooth dough. Use your hands to finish combining the mixture.
3 - Wrap the dough in cling film and pop in the fridge for 30 minutes to allow it to firm up, this will help your biscuits keep their shape while baking.


4 - Preheat your oven to 180°C (350°F) or gas mark 4.
5 - Roll out your dough to approximately 7mm thick on a well-floured surface. Using the smaller Herdy cookie cutter, cut out as many biscuits as you can, we made 20. Place them on a non-stick baking tray or line your tray with parchment paper, leaving space between each biscuit.
TOP TIP: To make sure your biscuits keep Herdy's famous smile, be sure to flour your cookie cutter well.
6 - Bake for 9-10 minutes then remove from the oven and allow to fully cool on a wire rack.
7 - While the biscuits cool, prepare the chocolate cream filling. In a bowl, mix the softened butter with the icing sugar and cocoa powder until light and creamy. Finally, add a couple of drops of vanilla extract. To make life a little easier, you can always use shop bought buttercream (we won’t tell anyone).


8 - Once your biscuits are fully cooled apply a generous spoonful of chocolate mixture to the center of one of your biscuits. Using the back of your spoon, smooth the mixture neatly covering the whole biscuit (don’t forget Herdy’s ears). Use a second biscuit to sandwich the mixture and press down gently. Repeat until you have used up all your biscuits.
9 - Allow the mixture to firm up for 30 minutes, this helps keep your biscuits held together. Finally, pour yourself a glass of milk or pop the kettle on and enjoy a Herdy Bourbon Biscuit (or two).
Featured Products
Who doesn’t love a custard cream? They’re a tasty treat and the perfect accompaniment to a Herdy brew.
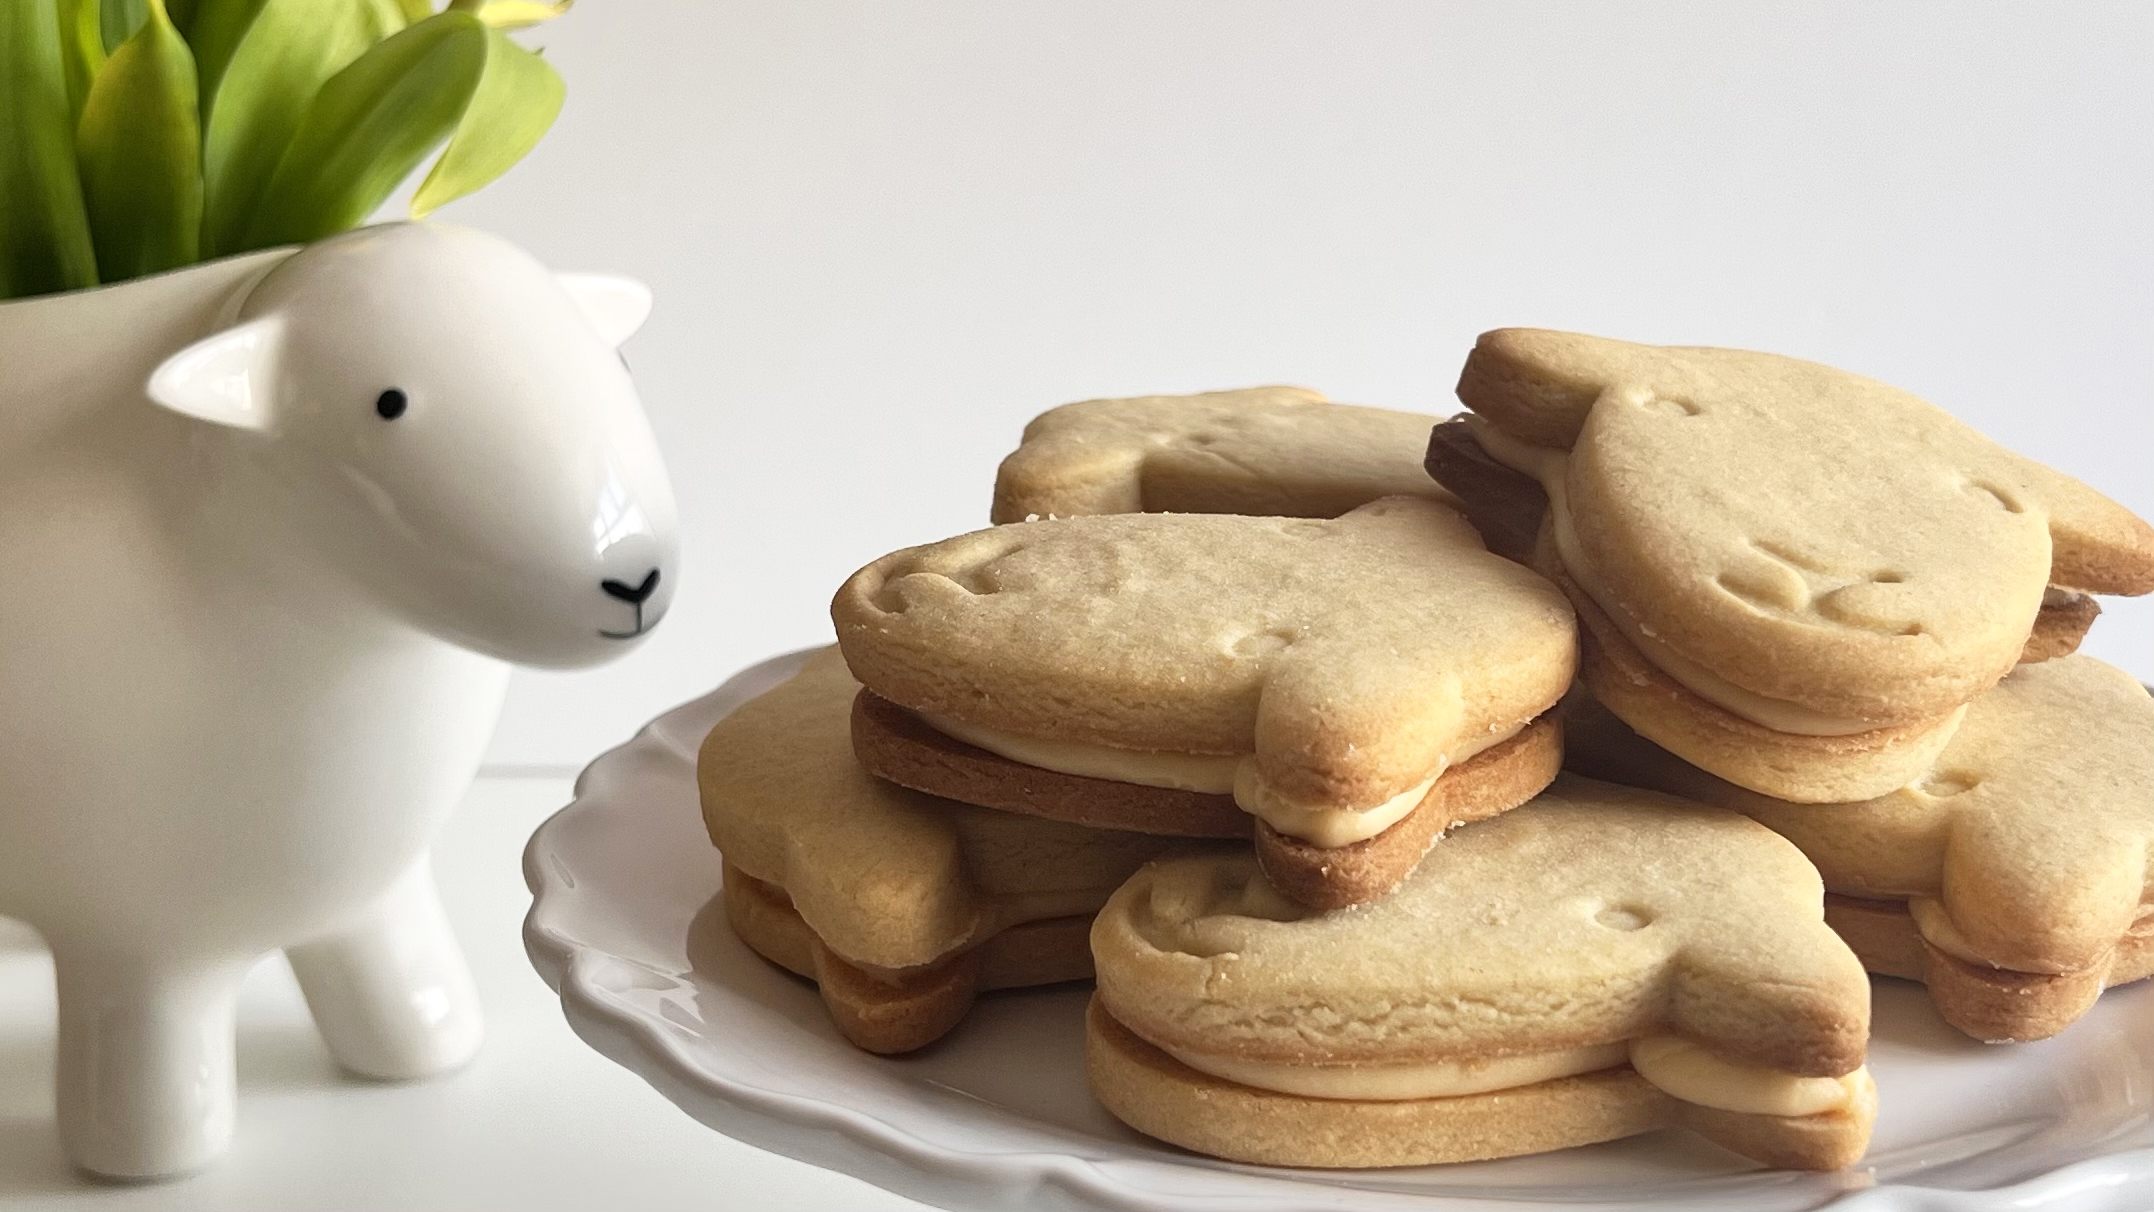
Treat yourself to some classic homemade Custard Cream Biscuits with Herdy’s easy-to-follow recipe. With a buttery biscuit and a scrumptious custard filling, these nostalgic treats will certainly make ewe smile.
- Makes 9 sandwiches
- Takes approximately 40 minutes (plus chilling time)
- Rating, easy
Ingredients
- 175g room temperature butter
- 50g caster sugar
- 50g icing sugar
- 2 egg yolks (from large eggs)
- 1 tbsp milk
- 300g plain flour
- Vanilla Butter Cream
- 2 tbsp custard powder

Method
- Preheat your oven to 180°C (350°F) or gas mark 4. In a large mixing bowl, cream together the softened butter, caster sugar, and icing sugar until smooth and creamy, using a wooden spoon.
- Gently incorporate the egg yolks and milk into the butter mixture until well combined.
- Gradually sift in the flour to ensure a smooth dough, removing any lumps. If the mixture feels too stiff, add a couple more tablespoons of milk. Use your hands to combine the mixture into a dough and need for a couple of minutes. Wrap the dough in clingfilm and pop in the fridge for 30 minutes to allow it to firm up, this will help your biscuits keep their shape while baking.


4. Roll out the dough to approximately 7mm thick on a well-floured surface. Using your Herdy cookie cutter, cut out 18 biscuits. Place them on a baking tray lined with parchment paper, leaving space between each biscuit.
5. Bake in the preheated oven for 9-10 minutes, or until the edges of the biscuits turn lightly golden. Remove from the oven and allow to cool on a wire rack.
6. While the biscuits cool, prepare the custard cream filling. In a bowl, mix the softened buttercream with the custard powder until smooth and creamy.


7. Once your biscuits are fully cooled apply a generous spoonful of custard mixture to the center of one of your biscuits. Using the back of your spoon, smooth the mixture nearly covering the whole biscuit ( don’t forget Herdy’s ears). Use a second biscuit to sandwich the mixture and press down gently. Repeat until you have used up all your biscuits.
8. Allow your mixture to firm up for 30 minutes, this helps keep your custard creams held together. Finally, pop the kettle on, make a brew and enjoy a Herdy Custard Cream (or two).
Featured Product
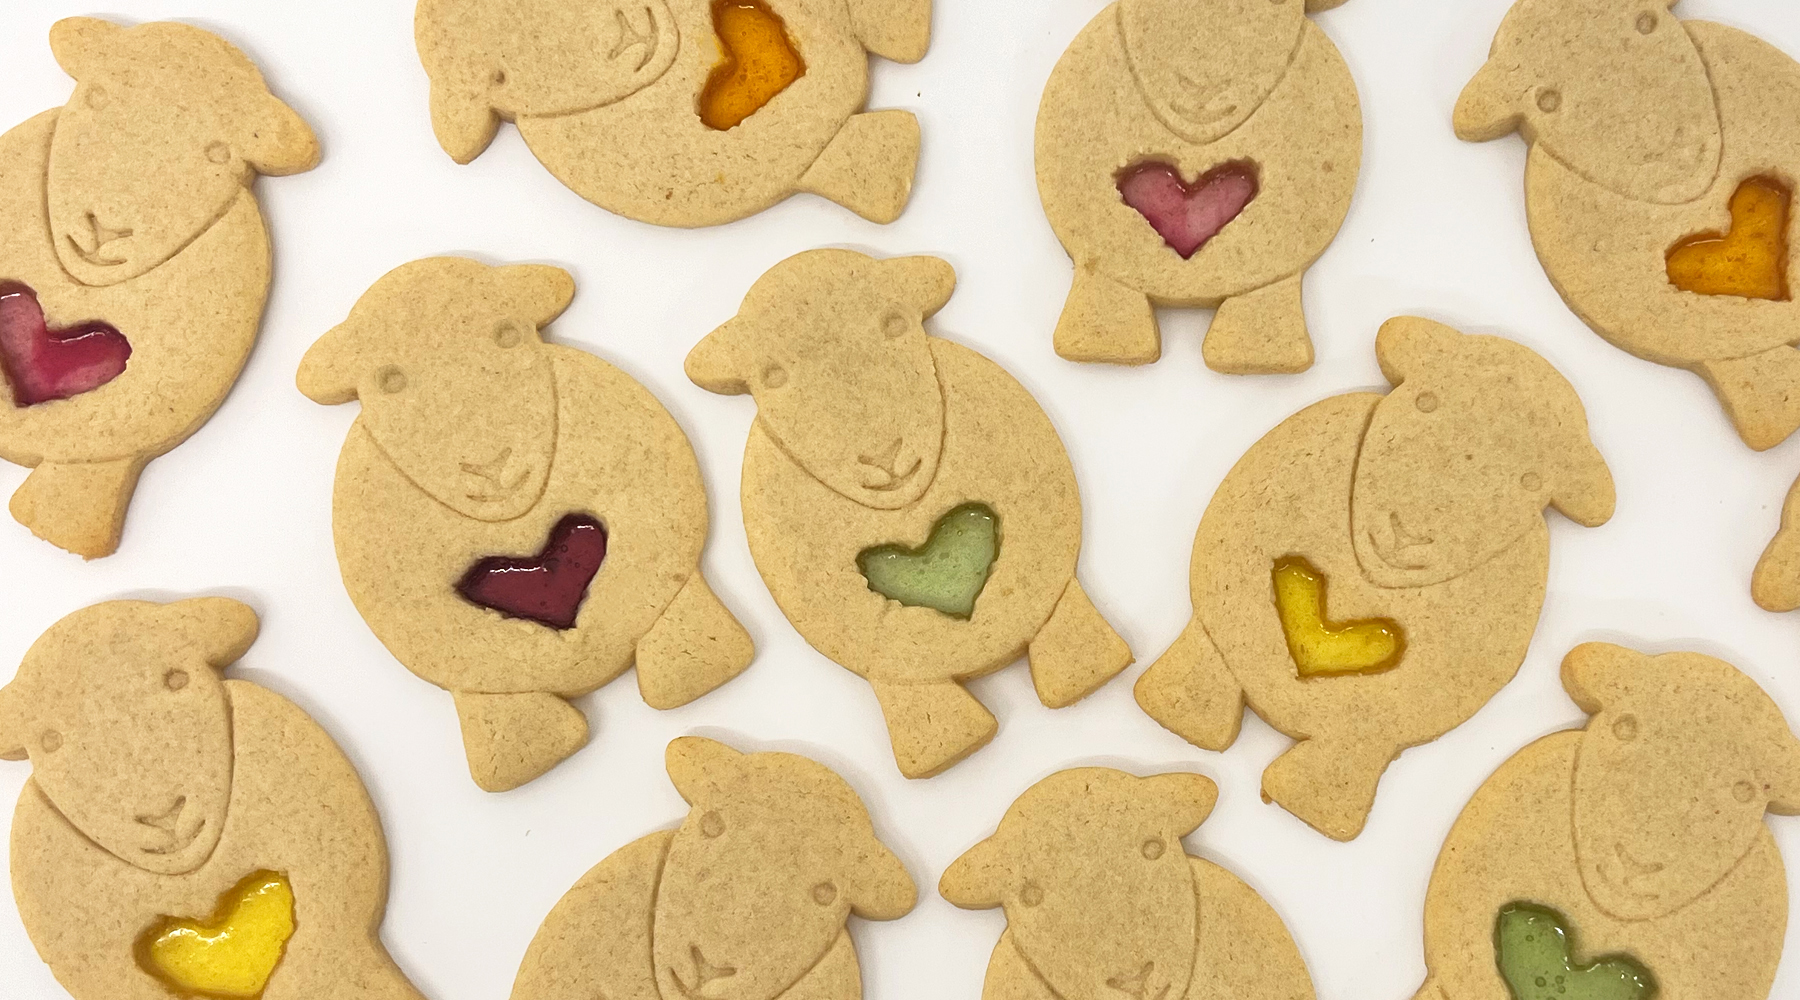
What could be nicer than treating yourself to some delicious Herdy sugar cookies with a yummy festive twist?
Super easy to make and deliciously sweet. Create your own flock of festive Herdy-shaped stained glass cookies and spread some holiday cheer!
Don't forget to accompany these with a brew in your favourite Herdy mug.
Ingredients
- 170g butter, softened
- 150g sugar
- 1 large egg
- 1 tsp. vanilla extract
- 300g all-purpose flour
- Selection of hard-boiled sweets
Cooking Time: 10 min
Makes: approx 12
Difficulty: Easy/moderate
Ewe will need
- Herdy Cookie Cutter Set
- Mixing bowl
- Sieve
- Rolling Pin
- Parchment Paper
- Pallet knife / spatula
Method
- Step 1
In a large bowl, mix together the butter and sugar until the mixture is creamy in texture. Make sure you don’t overwork the mix, or your biscuits may spread during baking.


- Step 2
Beat in the egg until well combined. Sieve in the flour and baking powder and mix until a dough forms. Place the dough on a floured surface and give it a quick knead so your mix is easier to work with. Chill your dough in the fridge for 1-2 hours.
- Step 3
Preheat your oven to 180°C or gas 5. Roll out your mixture to approximately 6mm thick. Use the large Herdy Cookie Cutter to cut out your shapes. Try to reuse as much dough as you can to minimise waste, we got 12 biscuits out of the mixture. With a cocktail stick, draw a heart shape on Herdy’s tummy, then carefully cut out the heart. Use a palette knife to transfer the biscuits to a baking tray lined with baking parchment, or a silicone baking mat.
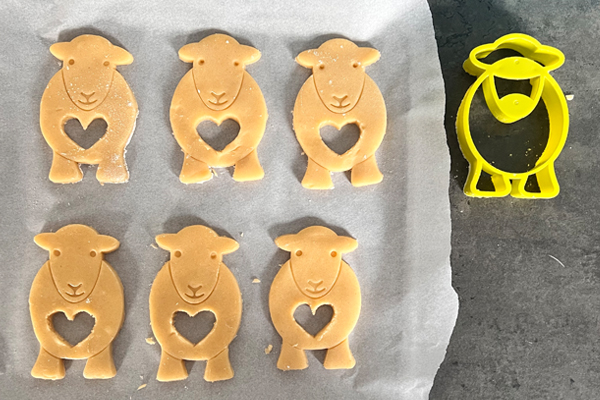
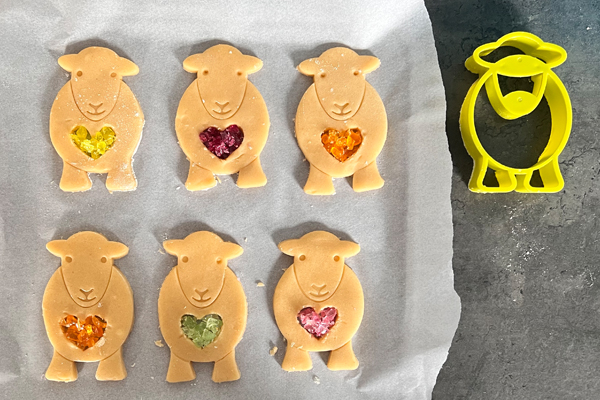
- Step 4
Separate your hand-boiled sweets into individual colours. To crush your sweets, you can use a rolling pin or meat mallet. We found that using a sharp knife to half the size of the sweets helped with the crushing process. Make sure you crush your sweets on a chopping board to keep your work surfaces safe.
- Step 5
Sprinkle your crushed sweets into the heart-shaped hole approximately ¾ full. Bake for around 10 minutes, or until slightly golden at the edges. Remove from the oven and allow to cool fully, be very careful not to touch the liquid sweets in the centre.
SERVING SUGGESTION: Get cosy by the fire with a mug of hot chocolate, pop your favourite festive film on the telly, take the weight off your feet and enjoy.
Featured Product
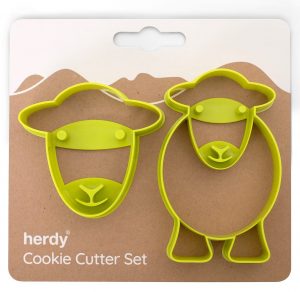
Herdy Cookie Cutter Set
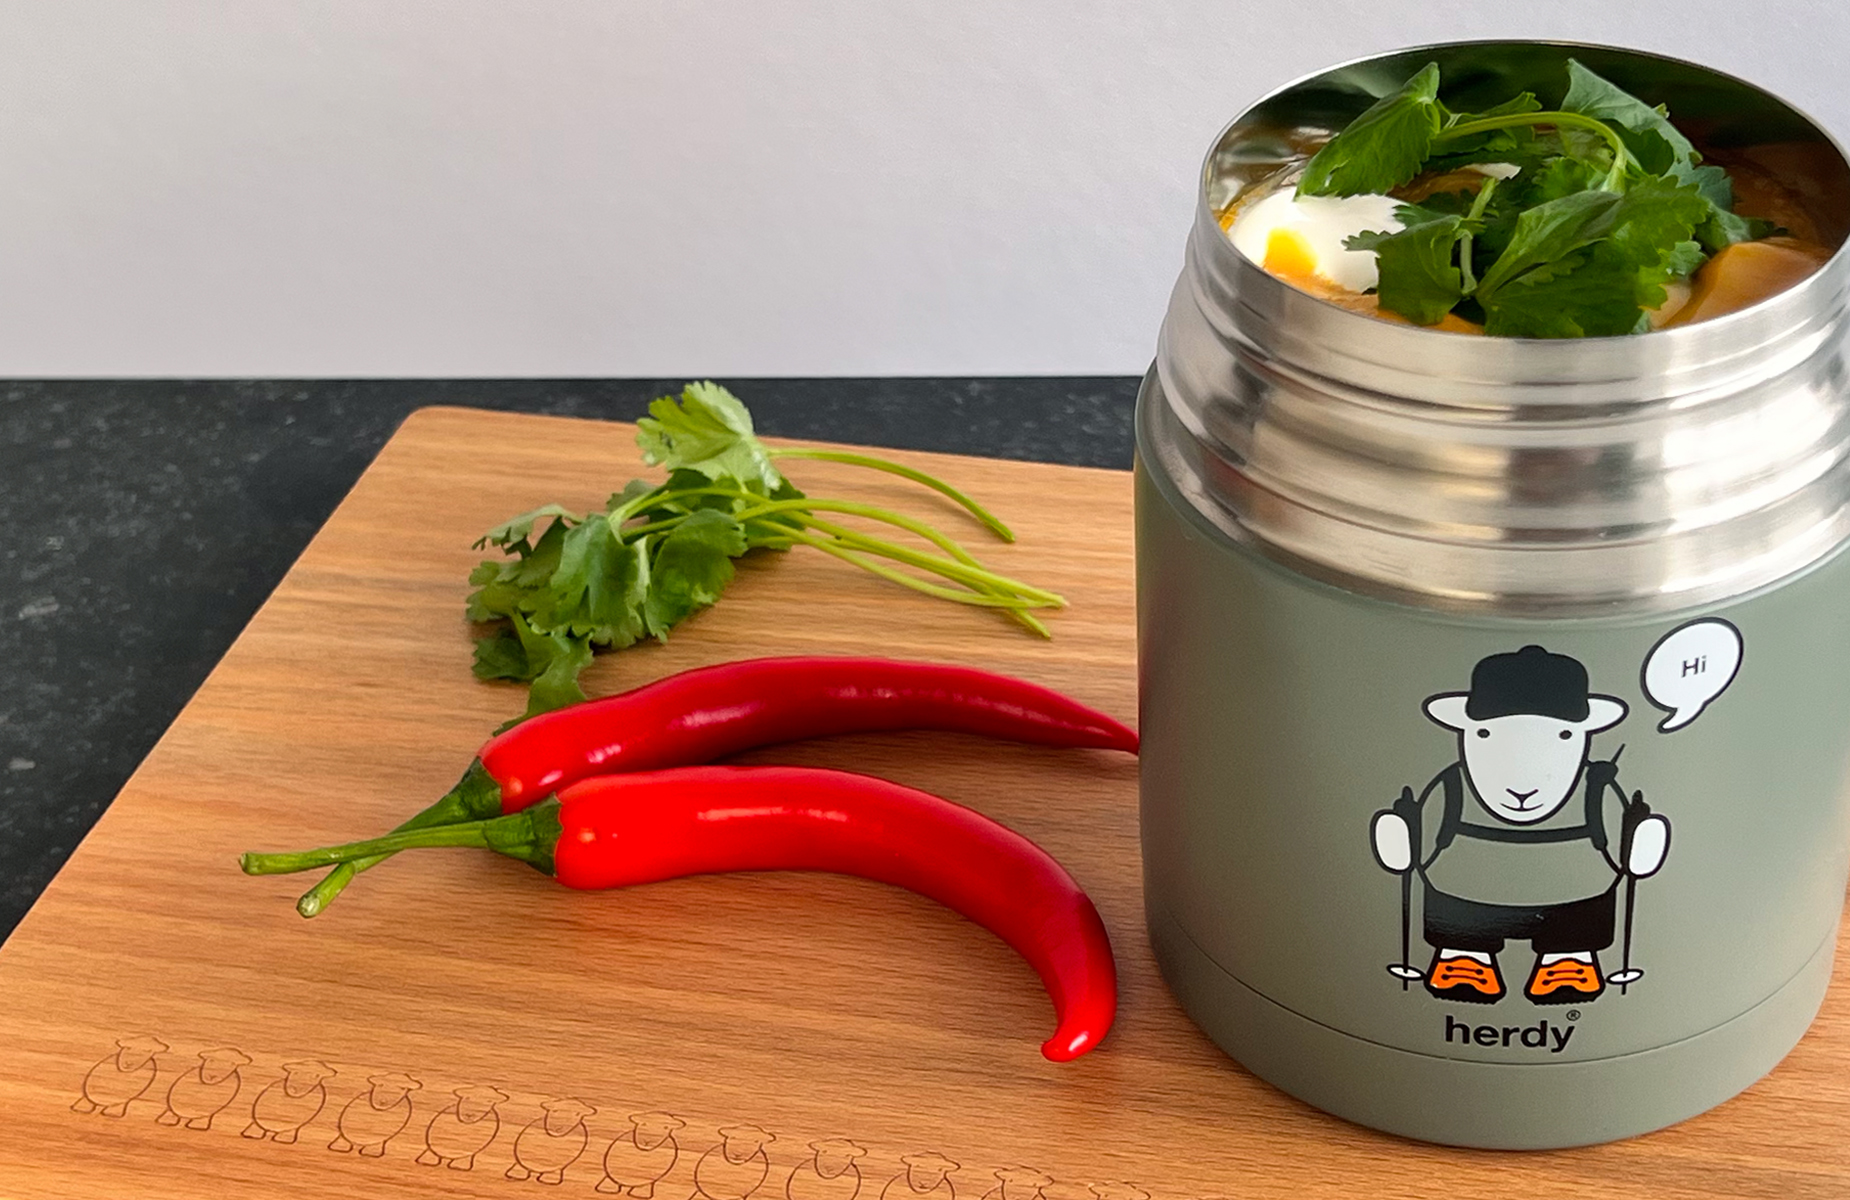
As the leaves change and the air turns crisp, there's no better way to embrace the season than with a steaming bowl of homemade soup. We're excited to share two autumnal soup recipes that aren’t only warming and comforting but also bursting with flavour. Whether you're a fan of creamy textures or a touch of spice, these recipes are sure to bring a touch of Autumnal magic to your kitchen. So, gather your ingredients, don your apron, and let's get cooking!
Smoky Butternut Squash Soup
Herdy’s smoky Butternut Squash Soup recipe is smooth, warming, flavoursome and packed full of goodness, a heartwarming dish that’s perfect for the season. Best of all, it's incredibly easy to make, ensuring that you can savour the tastes of autumn with minimal effort.
Prep time is around 15 minutes with a cooking time of 50 minutes. You should get 4 hearty portions with this recipe.
Ingredients:
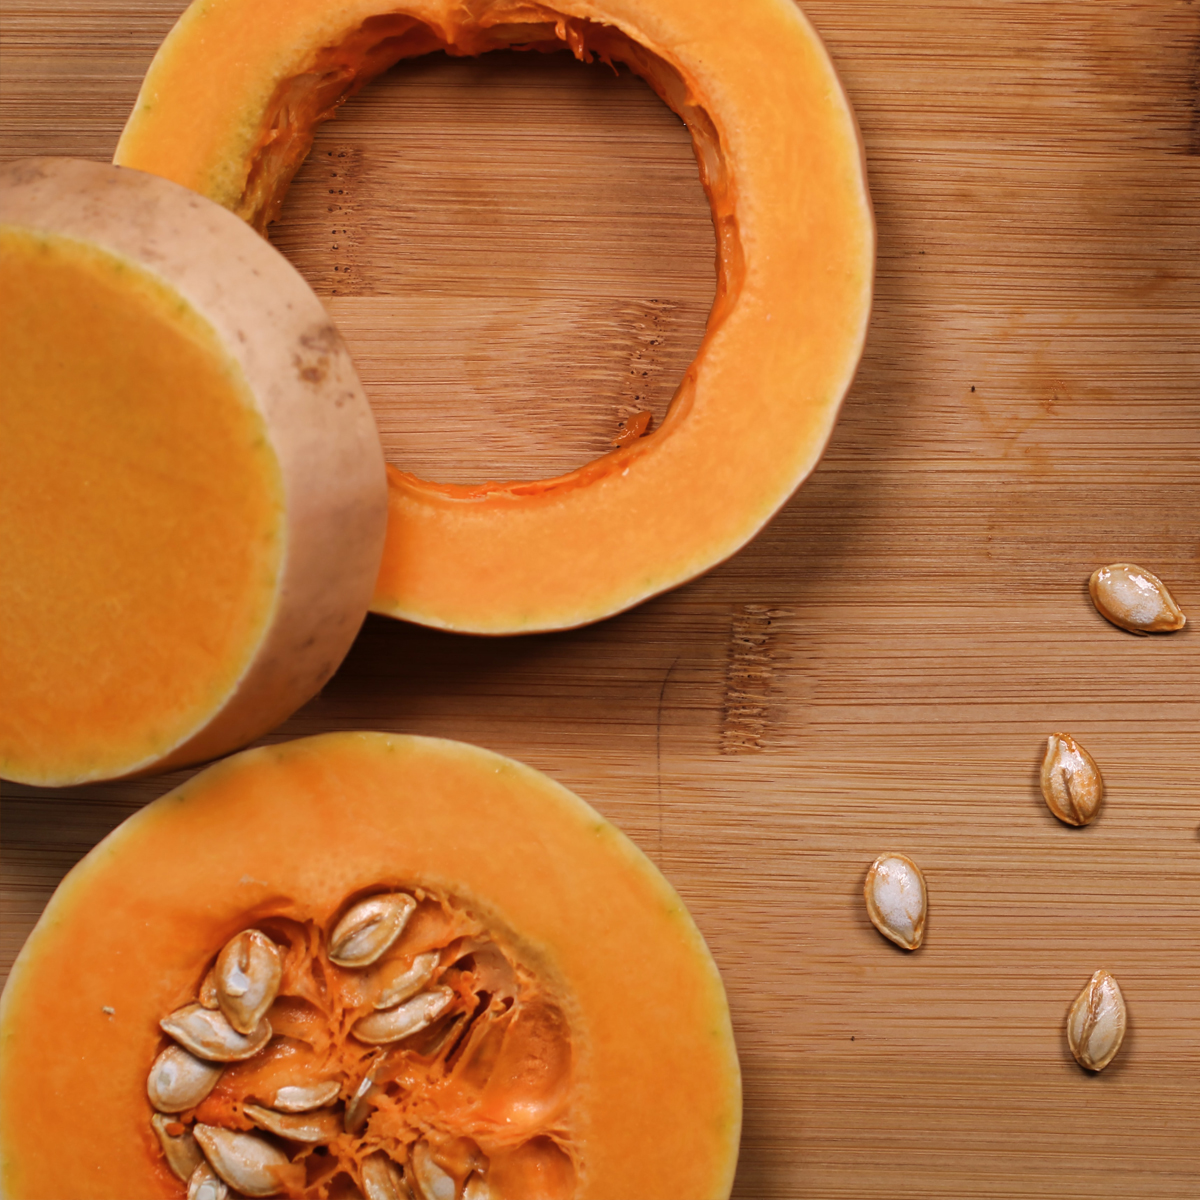
1 butternut squash, (approx 1kg) peeled and deseeded
2 tbsp of olive oil
1 tbsp of butter
2 onions, diced
1 garlic clove, diced.
2 mild red chillies finely chopped.
850ml of vegetable stock.
4 tbsp of creme fraiche and additionally more on the side to serve with the soup.
1 tsp Cumin
1 tsp Smoked Paprika
Cooking Method:
- 1: preheat oven 200C/180C for a fan oven or a gas oven 6
- 2: cut the butternut squash into chunks about 1 and a half inches thick and throw it in a roasting tin with 1 tbsp of olive oil, plus the Cumin and Smoked Paprika.
- 3: Roast for 30 minutes and give them a toss halfway through.
- 4: While your squash is cooking, melt the butter with the remaining tbsp of olive oil in a large saucepan, add the onions, garlic, and three-quarters of the chilli, remove the seeds if you prefer a milder kick.
- 5: Cover the saucepan and cook on low heat until the onions have softened.
- 6: Transfer the butternut squash into the pan, add the stock and crème fraiche, then blend until smooth.
- 7: Return the soup to the pan, reheat on low heat and season to taste, once ready serve the soup in bowls with a splash of crème fraiche and a dashing of the remaining chillies and enjoy!
For an extra treat, try frying some finely diced smoked pancetta and add to your mix.
Thai Pumpkin Soup
This scrumptious soup combines the earthy sweetness of pumpkin with the vibrant aromatic spices of Thai cuisine, creating a warming bowl of delicious soup.
The dish takes around 25 minutes to prepare and a further 40 minutes to cook. You should get 6 hearty portions from this recipe.
Ingredients:
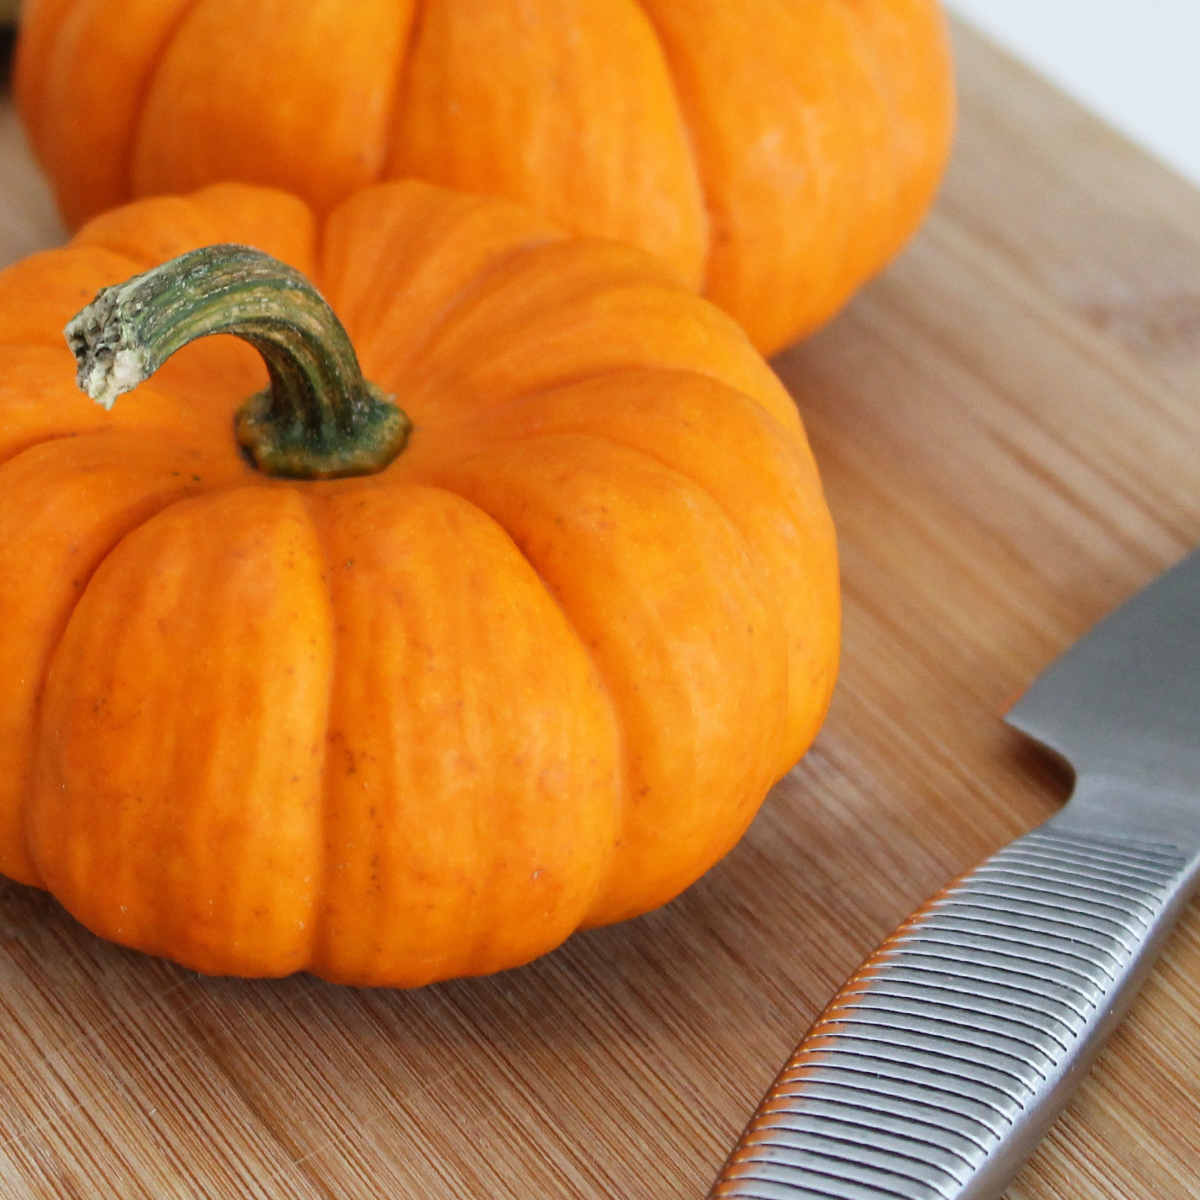
1 large pumpkin peeled and deseeded
4 tbsp of sunflower oil
1 medium sliced onion
1tbsp grated ginger
1 crushed lemongrass
3 tbsp of red Thai curry paste
400ml of canned coconut milk
850ml vegetable stock
Lime juice and sugar for seasoning
Handful of fresh coriander to serve
Cooking method:
- 1: Heat oven to 200C/180C fan/gas 6. Peel and cut your pumpkin then toss into a roasting tin with half the oil and seasoning, then roast for 30 minutes which should turn the pumpkin a rich golden colour.
- 2: Whilst your pumpkin is roasting in the oven, fry the onion, ginger, and lemongrass in the remaining oil for 8 to 10 minutes, stirring occasionally. Then combine with the curry paste and stir for another couple of minutes.
- 3: Add the roasted pumpkin to the pan, plus the coconut milk and vegetable stock (save a couple of spoonfuls of coconut milk for serving).
- 4: Remove the lemongrass and let your mixture cool for a couple of minutes. Then whizz until smooth with a blender.
- 5: Reheat your soap and add a squeeze of fresh lime juice and a sprinkling of sugar.
- 6: To serve, drizzle with the remaining coconut milk and scatter with chopped fresh coriander.
Featured Products
Ewe can make S’Mores indoors! With Herdy’s super easy recipe, they’re the perfect after school treat for hungry tummy's.
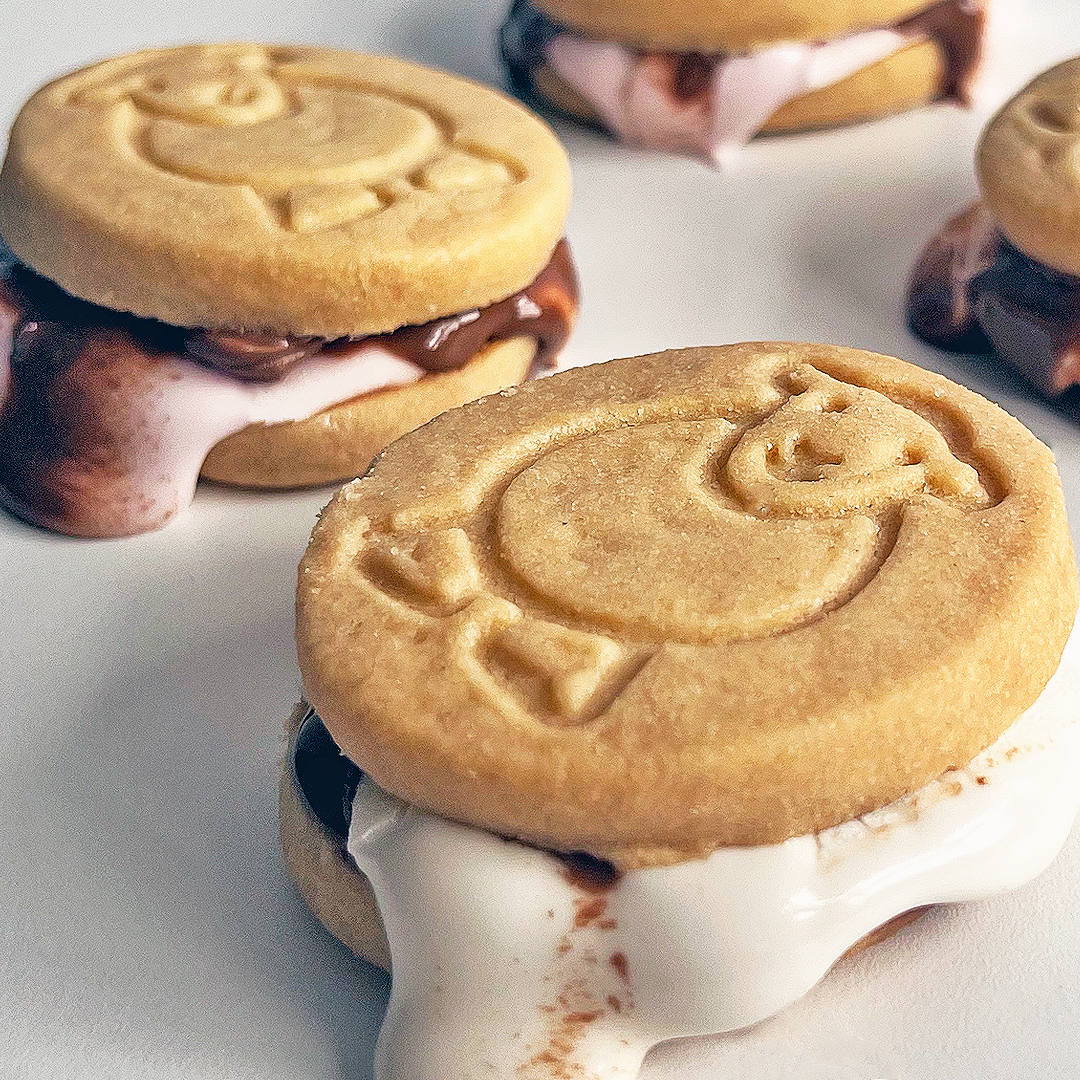
Herdy’s taken the classic American S'more and given it a British twist, by swapping out traditional graham crackers for oh-so-buttery Herdy shortbread. And the best part, no campfire required. Ewe can make these delicious treats in the comfort of your own home, you’ll be guaranteed to have chocolate on your face in less than 5 minutes.
What is a S’more?
A S’more is a gooey cracker sandwich made from melted milk chocolate, traditionally graham crackers (an American version of a Digestive), and toasted marshmallows.
Why is a S’more called a S’more?
Back in the 1950s, someone decided to shorten "some more" into "s'more." Because who can resist the temptation of wanting "some more" chocolatey goodness.
Ingredients to whip up Herdy’s oven baked S’mores:
-
Herdy's shortbread ovals – these buttery treats are here to take your s'mores game to a whole new level.
-
A mix of pink and white marshmallows – because colourful marshmallows are just more fun, aren't they?
-
Milk chocolate – the star of the show, we used 35% cooking chocolate.
How to make S’more’s indoors:
Now, I know what you're thinking. "How can you make s'mores without a campfire?" Fear not, for the oven is your new campfire!
- Pre-heat your oven to 200 degrees
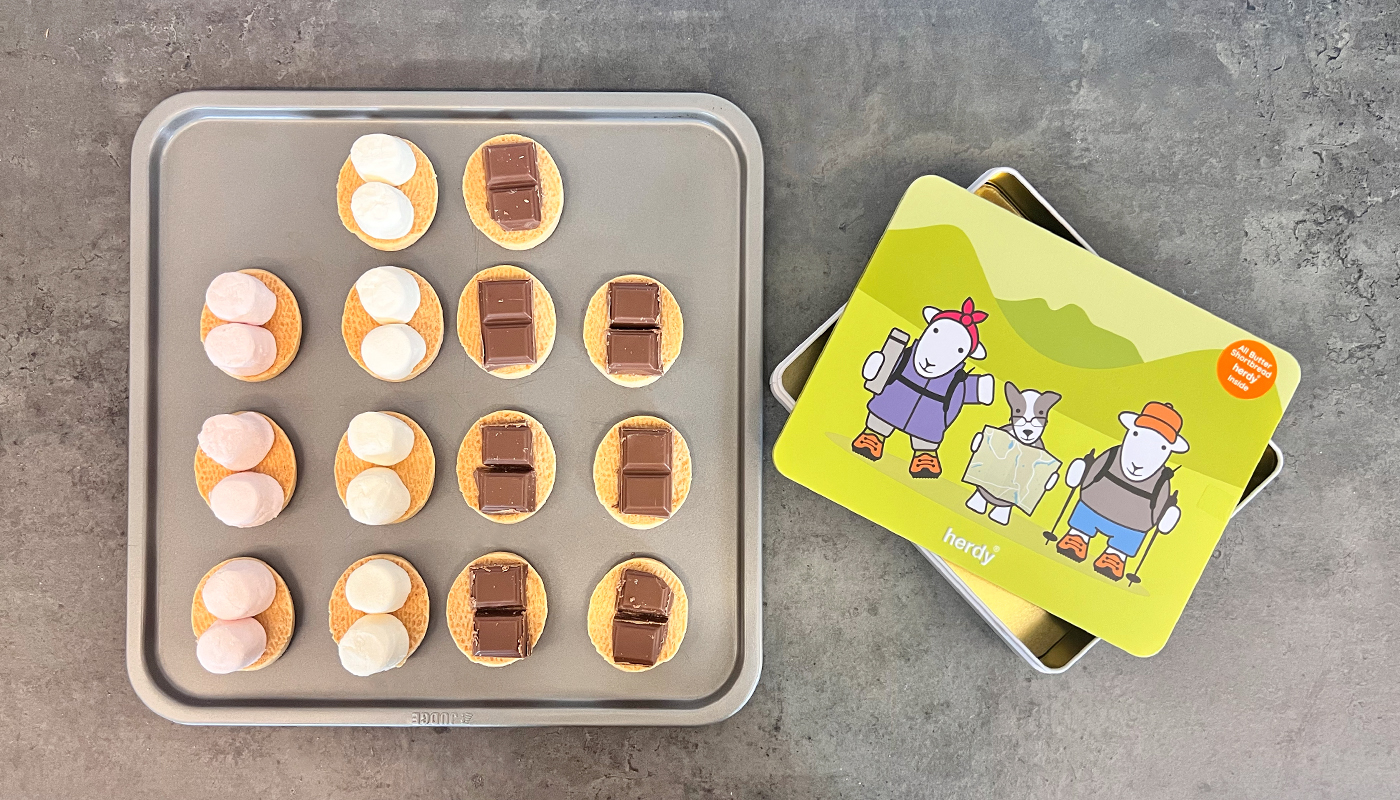
- lay out 14 Herdy shortbread ovals, face down.
- On half of the shortbread, place a marshmallow. If you want your s’mores to be more user-friendly, we recommend using one marshmallow. However, if you’re happy with sticky fingers, you can use two.
- On the other half of the shortbreads, place a portion of milk chocolate, we used two squares.
- Repeat with the remaining shortbread.
- Slide your s'mores-to-be into the oven for 1-2 minutes. Keep your eyes peeled, because chocolate and marshmallows can go from zero to gooey in seconds!
- Pair a marshmallow-covered shortbread with its chocolate counterpart. Then, squish those elements together into a melty, gooey masterpiece.
- Enjoy while warm.
- Finally, dive into your Herdy S'mores while they’re still warm and gooey.
So next time you're craving that classic campfire treat, don't let the weather dampen your spirits. Take your shortbread, marshmallows, and chocolate, and let the oven work its magic.
And when you're done, don't forget to make "s'more"!
Featured Products
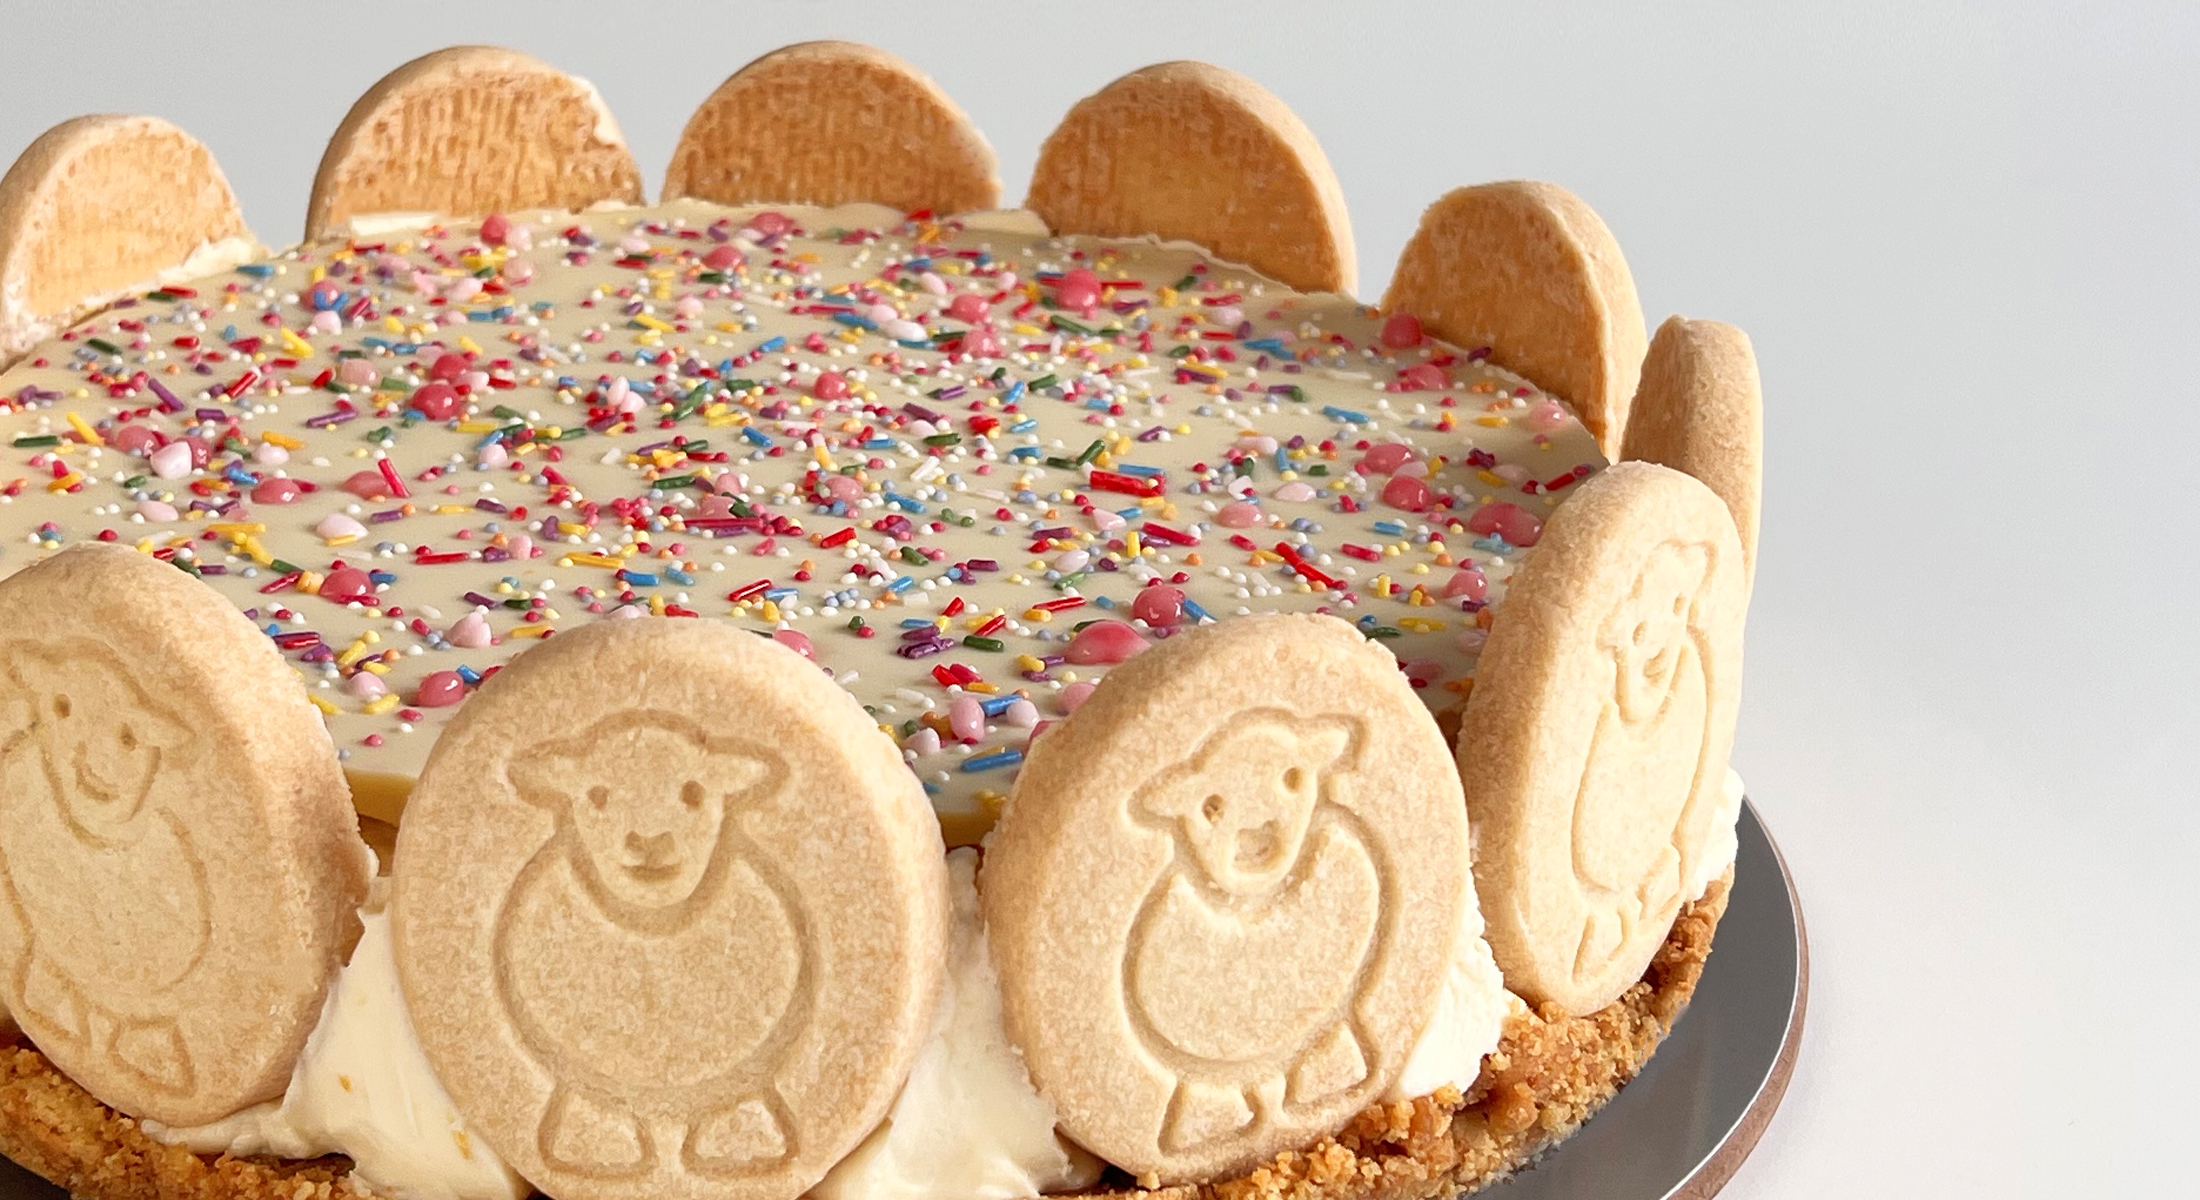
Indulge your taste buds with Herdy’s No Bake Lemon Cheesecake - a scrumptious fusion of zesty lemon goodness, velvety cream cheese, and a burst of colourful chocolate bark!
This delicious pud is a true showstopper, perfect for summer picnics, dinner parties, or keeping the little ones entertained over the summer holidays.
With easy-to-follow steps, you'll create a scrumptious chocolate bark before preparing the luscious cheesecake filling, all held together by herdy's cheeky smile (in shortbread form). No oven required, just a little patience as you let your masterpiece set to perfection in the fridge.
What Ewe Will Need:
For the cheesecake
- 12 herdy shortbread ovals
- Digestive Biscuits / 220g
- Unsalted Butter / 70g
- Full-fat soft cheese / 330g
- Icing Sugar / 65g
- Double cream / 170ml
- Zest of 2 lemon
For the Chocolate Bark
- 300g white chocolate
- Sprinkles
Tools
- 22 cm cake tin
- 20 cm cake tin
- Greece proof paper
- Whisk
Method:
Step 1
First, ewe need to make your Herdy bark (not the WOOF! kind, the chocolate kind). Start by melting your white chocolate in a large bowl, you can do this in the microwave, or a bain-marie.
Step 2
Place a piece of greaseproof paper in the bottom of your 20-inch cake tin and pour in your melted white chocolate. Once all your chocolate is in the cake tin, give the tin a little bang to get out the air bubbles, this will also help level the mix.


Step 3
Take a small handful of your favouite sprinkles and begingscattering them all over your chocolate (it will begin to look like a giant …) We have just used sprinkles, however, you could use mini marshmallows, dried fruit, nuts or popcorn.
Step 4
Now it's time to make your cheesecake! Start by crumbling your digestive biscuits into a large bowl, you can use a rolling pin for this or a blender if you have one. Melt 70g of unsalted butter and add to the biscuits. Once the ingredients are combined, spoon your mix into a 22-cm cake tin, lined with greaseproof paper and press down with the back of a spoon. The base only needs to be thin, as you will be adding more biscuits later! Place your base in the fridge to start the setting process.


Step 5
Now it’s time to make your cheesecake filling. Pour the double cream into a large mixing bowl and whisk until the cream thickens into soft peaks. In a separate bowl, place the cream cheese, lemon zest and icing sugar then mix. Combine both bowls, carefully folding in the cream until you get a thick consistency that holds its shape.
Step 6
Take your cheesecake base out of the fridge ready to fill. Start to gently spooning big dollops of the cheesecake mixture into the centre of the tin, making sure not to touch the sides. Next, take your Herdy shortbread ovals and place them around the outside of the tin, Herdy’s face should be facing outwards. Once you have all the shortbread in place, gently push the cheesecake mixture to the edge of the tin, holding your shortbread in place. Try and level the top of your cheesecake the best you can, this will help with the final result.


Step 7
Once you have completed this step, place your cheesecake into the fridge for a couple of hours (best left overnight) for the mixture to set.
Step 8
Once your cheesecake has set, it's time to add the chocolate bark. Take both tins out of the fridge and gently take the set chocolate out of its tin. The greaseproof paper should make this easy, however, if you are struggling, place the tin in a shallow bowl of warm water to loosen the chocolate from the sides.
Step 9
Finally, place your chocolate bark on top of the cheesecake, it should fit nicely between the tops of your shortbread ovals, and then your cheesecake is ready to be enjoyed!
Featured Products
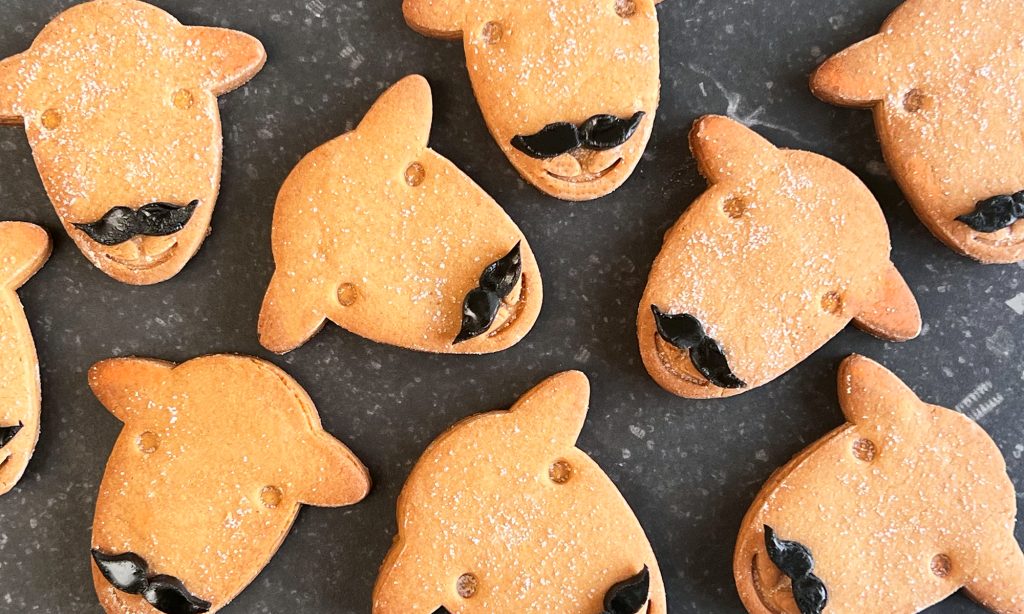
Is your Dad a tea monster? Then these tea-infused shortbreads will be the perfect accompaniment! Enjoy on their own or with a brew for a delicious Father’s Day treat.
Ingredients
- 125g unsalted butter
- 75g caster sugar
- 225g plain flour
- 3 tea bags
- 40ml milk
- Black royal icing
Makes A Bakers Dozen
Ewe will need
- Herdy Cookie Cutter Set
- non-stick baking tray
- Rolling pin
- Wire tray (for cooling)
- Mixing bowl and spoon
Method:
Preheat oven to 180’C/Gas mark 4.
- Let's brew up! First things first, it's time to make your tea infusion. Heat up 40ml of milk, on the hob or in the microwave. Next, take 3 tea bags (we’re using Yorkshire Tea, but you could use Earl Grey if your feeling fancy) and submerge them in the milk. Leave your tea bags in the milk for 10 minutes, so the mixture is nice and strong.


2. Next, cream together your butter and caster sugar in a bowl until light and fluffy.
3. Strain your tea bags and slowly stir in the liquid, you will be left with approximately 30ml to add to your mixture. Make sure the milk is at room temperature before adding it to your mix.
4. Sift in the flour and mix gently with a wooden spoon, then use your hands to create a smooth dough. If your mixture is a little loose, feel free to add in a bit more flour. Leave to chill in the fridge for 10 minutes.


5. Dust your work surface with flour and roll out the dough to approx 8mm thick - best to use guides for this to ensure even thickness.
6. Cut out your shortbread with the Herdy cookie cutter, for this recipe we are using the Herdy ‘Head” cutter. Take care to press down all areas of the cutter. Dip the cutter in flour in between cuts, to prevent sticking.
7. Transfer to a non-stick baking sheet and bake for 25 minutes at 180°C, gas mark 2.


8. Once cooked, allow to cool a little before transferring to a wire rack, then allow to cool fully before decorating.
9. To make Herdy’s moustache, dust your work surface with icing sugar then take some black royal icing and roll to approx 3mm thick. Then, carefully cut out 12 moustache shapes, around 4cm in width. To make things easier, you can create a moustache template out of some paper.
10. To attach Herdy’s tash, dissolve a little icing sugar in water to create a glue. Place a small blob over Herdy's nose and place the moustache on top. If your moustaches are looking a little frosted, use a small paint brush or cotton bud dipped in water to remove any excess icing sugar.
11. Finally, get the kettle on, and enjoy your shortbread with a nice cup of tea to celebrate Father’s Day.
Featured Product

Herdy Cookie Cutter Set
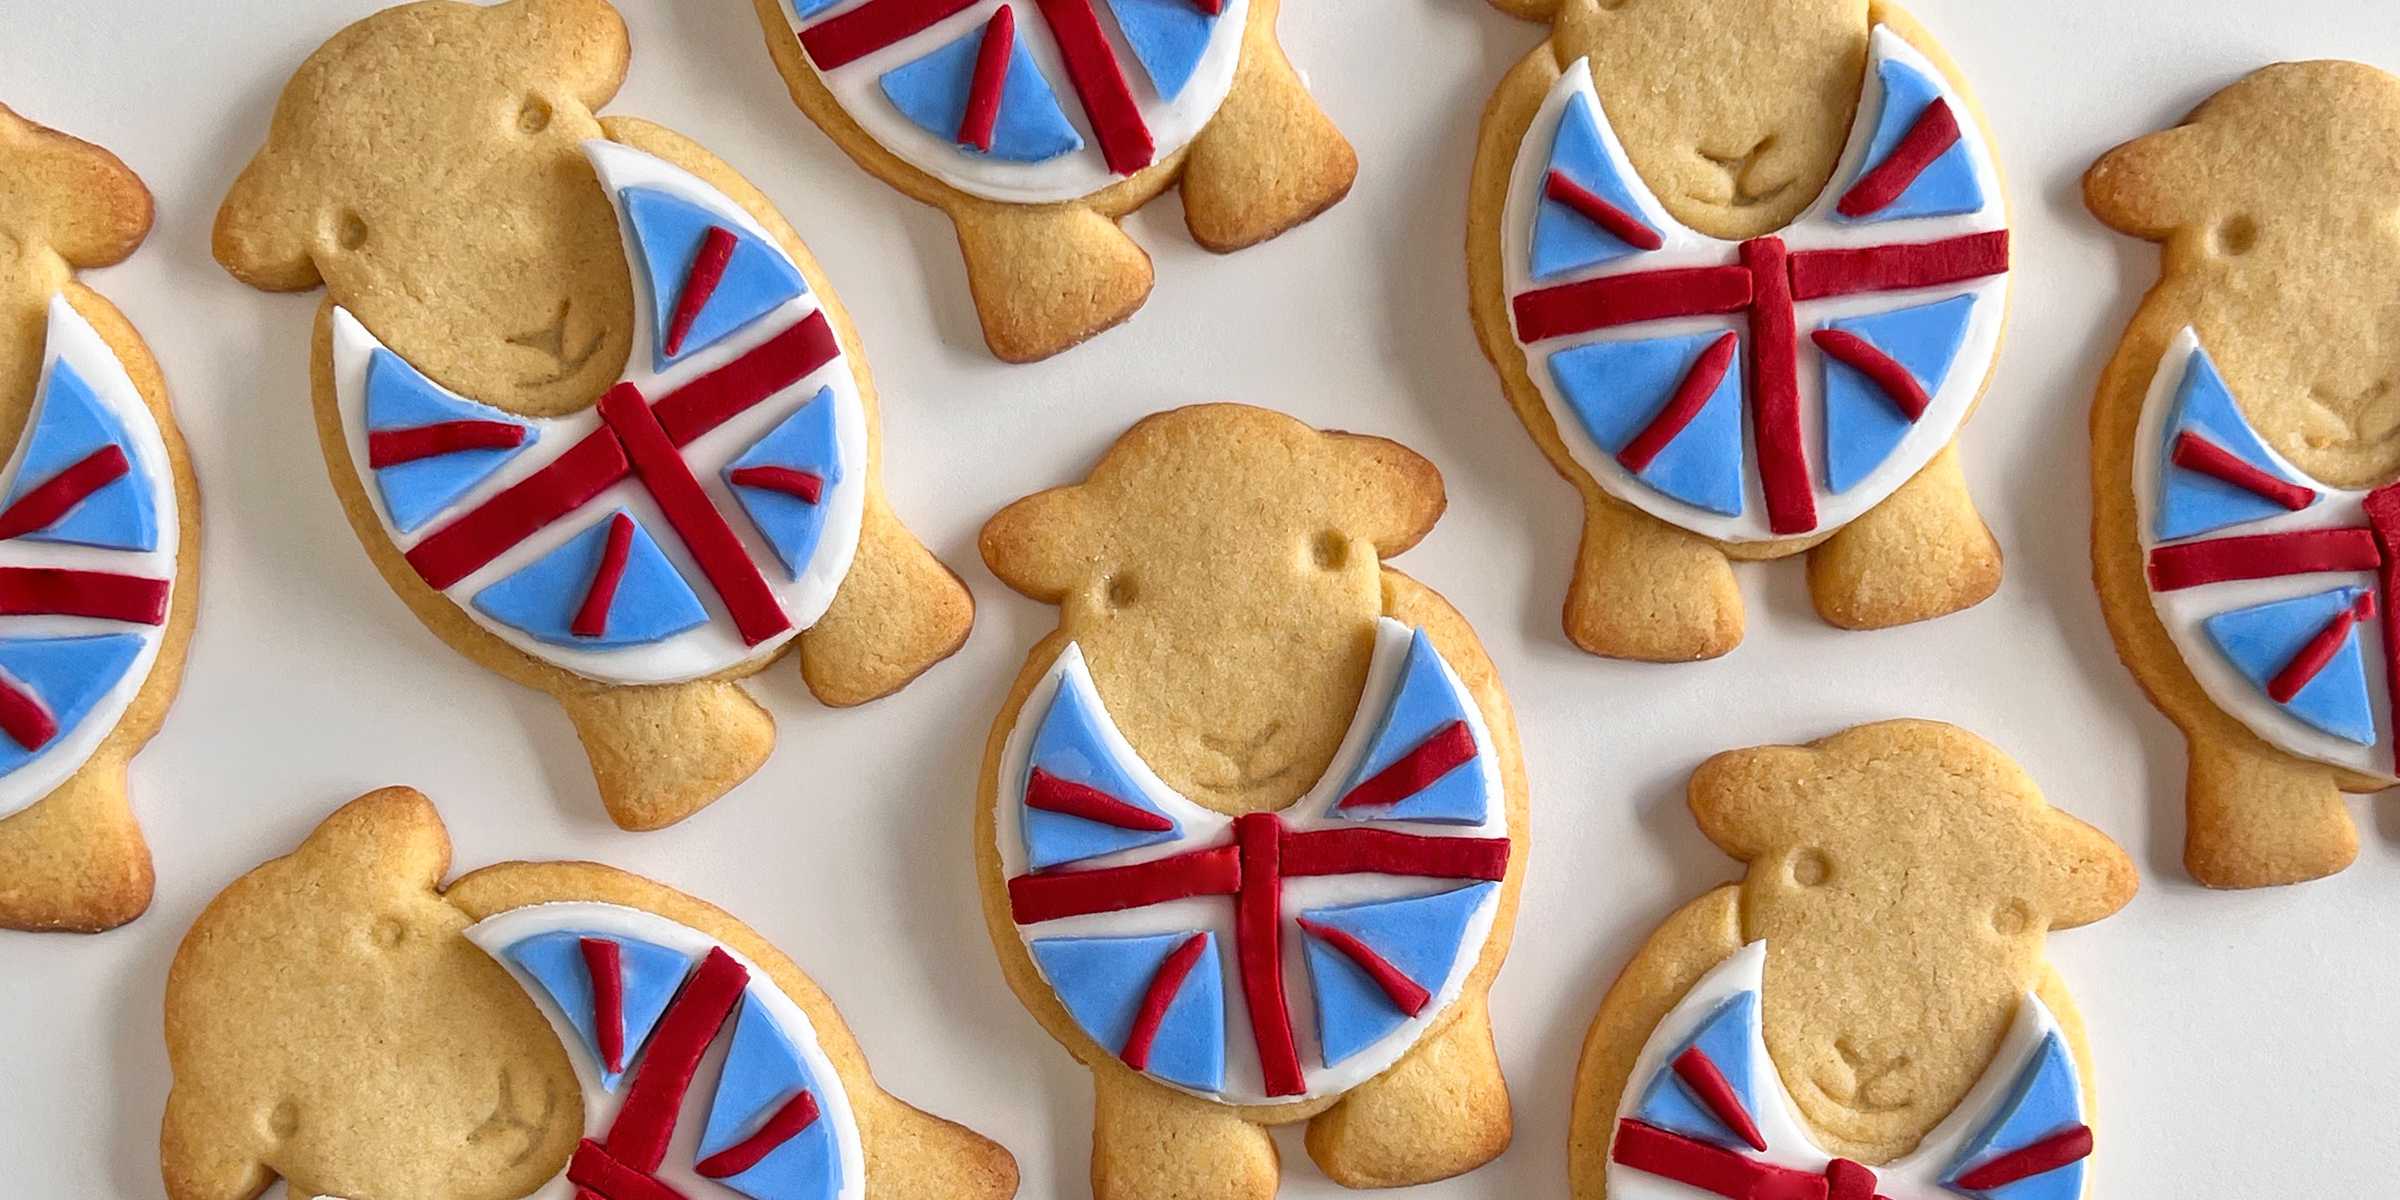
Whether you’re having a street party, or joining in the festivities with a brew in front of the telly, these coronation cookies are the perfect way to celebrate the coronation of King Charles III. Made with a simple sugar cookie recipe and decorated with a royal icing Union Jack.
Don't forget to accompany these cookies with a brew in your favourite Herdy mug.
Ingredients:
For the cookies
- 250g butter, softened
- 200g sugar
- 1 large egg
- 1 tsp. vanilla extract
- 360g all-purpose flour
- Half tsp baking powder
For the topping
- 50g Icing sugar
- 200g White royal icing
- 100g Red royal icing
- 100g Blue royal icing
Ewe will need
- Herdy Cookie Cutter Set
- Mixing bowl
- Sieve
- Rolling pin
- Parchment paper
- Paintbrush
- Ruler
- Sharp knife or scalpel
- Pallet knife / spatular
Cooking Time: 10 min
Makes: approx 15
Difficulty: Medium
- Step 1
In a large bowl mix together the butter and sugar until the mixture is creamy in texture. Make sure you don’t overwork the mix, or your biscuits may spread during baking.


- Step 2
Beat in the egg until well combined. Sieve in the flour and baking powder and mix until a dough forms. Place the dough on a floured surface and give it a quick knead so your mix is easier to work with. There is no need to chill the dough before rolling.
- Step 3
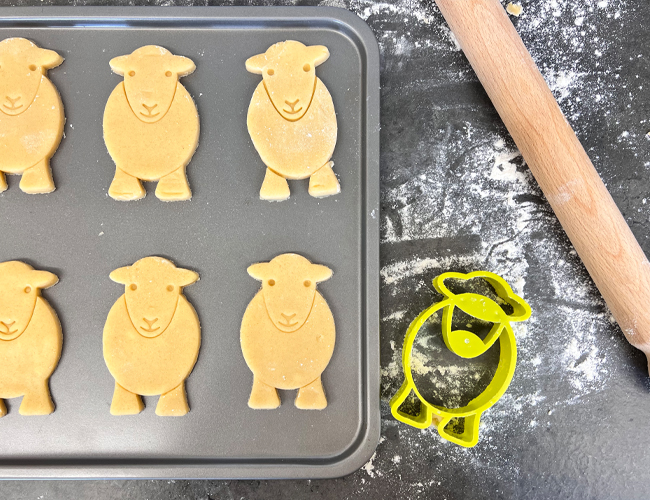
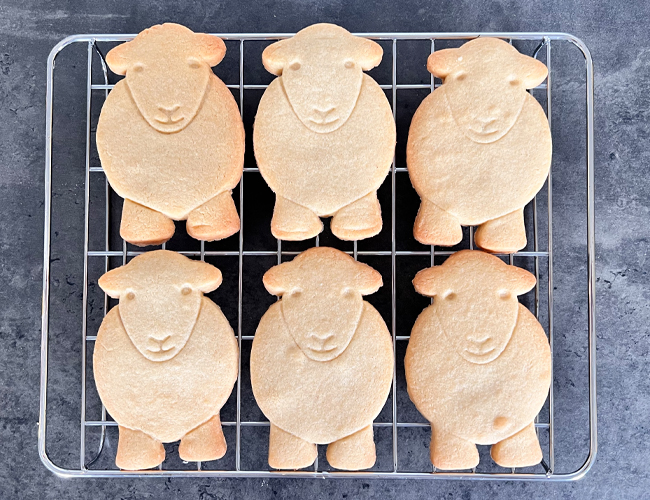
Preheat your oven to 180°C or gas 5. Roll out your mixture to approximately 7mm thick. Use the large Herdy Cookie Cutter to cut out your shapes. Try to reuse as much dough as you can to minimise waste, we made 15 biscuits out of the mixture. Use a palette knife to transfer the biscuits to a baking tray.
- Step 4
Bake for around 10 minutes, or until golden brown at the edges. Remove from the oven and place on a wire rack to cool.
- Step 5
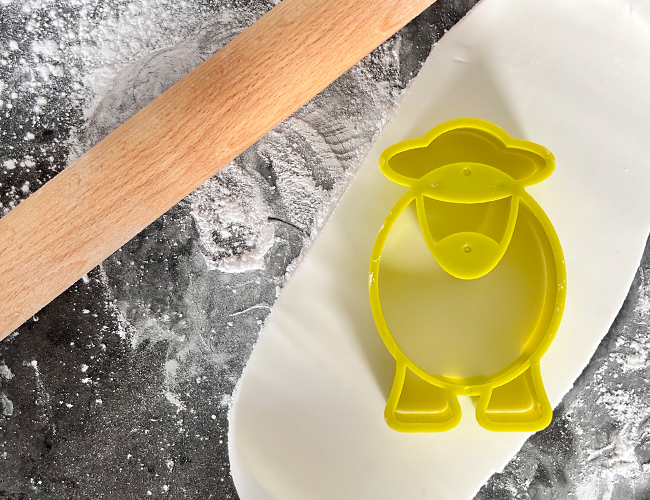
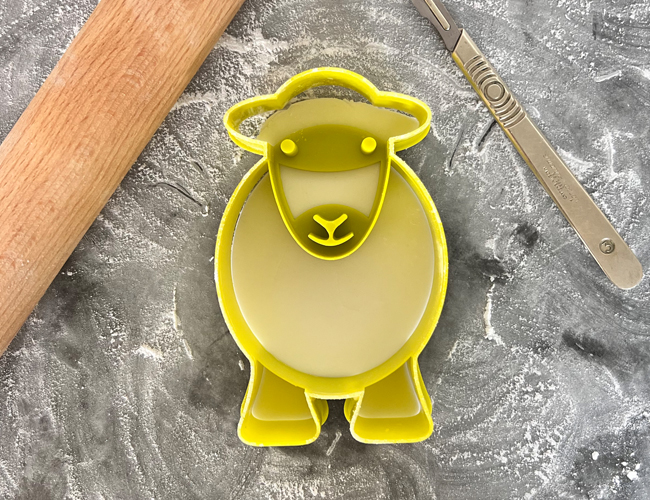
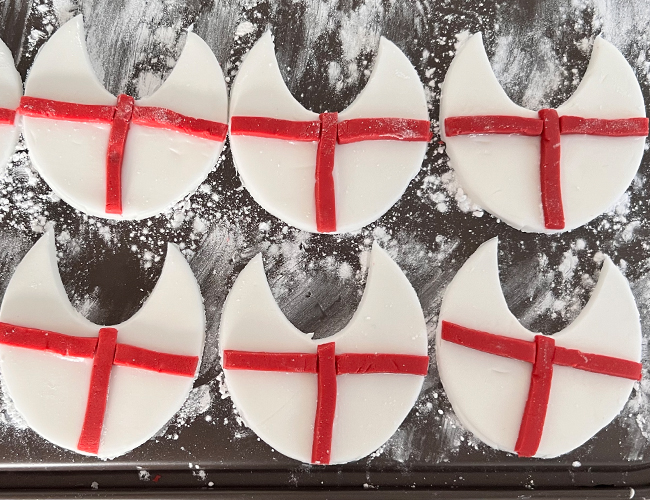
Now it’s time to make your Union Jack icing. Begin by rolling a thin sheet of white royal icing, approximately 2mm thick. The white layer will act as your base. Make sure you use plenty of icing sugar to prevent your royal icing from sticking. To get a neat outline, use your Herdy cookie cutter to cut out a Herdy shape from the icing. Then remove Herdy’s legs and face, this will leave you with a U-shaped piece of icing. Cut one piece for every biscuit and put them to one side.
- Step 6
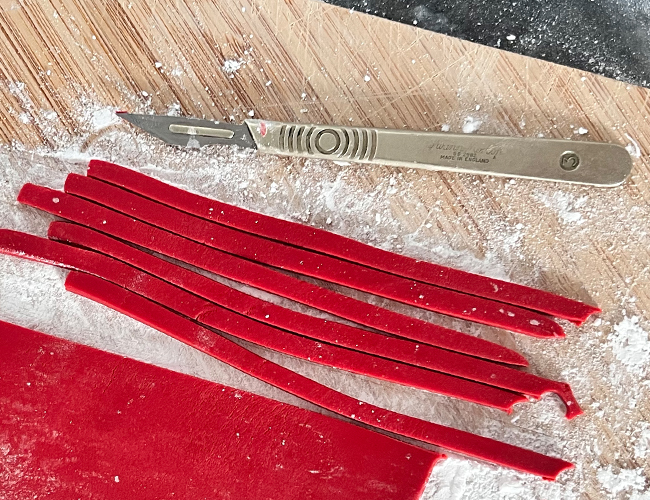
Next, thinly roll out your red icing. Using a ruler and sharp knife, cut slivers of icing appoximately 5mm wide, these will be used to create the large red cross at the centre of the Union Jack.
- Step 7
You will need to make a glue to stick all your icing pieces together, this can be made by mixing water with icing sugar until you get a sticky mixture that’s still a bit runny.
Using your icing glue and a small paint brush, create a cross on the white icing, with the centre of the cross being just under Herdy's chin. Lay your red icing over the glue, cutting to size as you go. Your icing should now resemble a St Georges Cross.
- Step 8
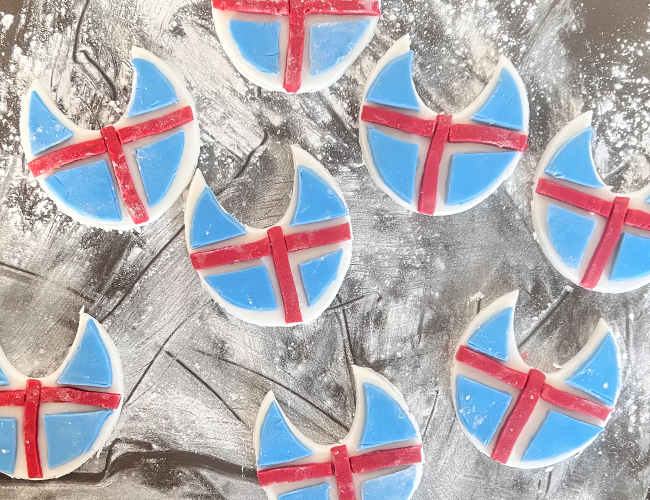
Next, roll out your blue icing, just as thinly as before. Cut out small triangles to fit into each corner of the cross, one side of each cross will need to be curved to match the outline of Herdy's body. Using the same glueing technique, stick down all the blue pieces to the white icing.
- Step 9
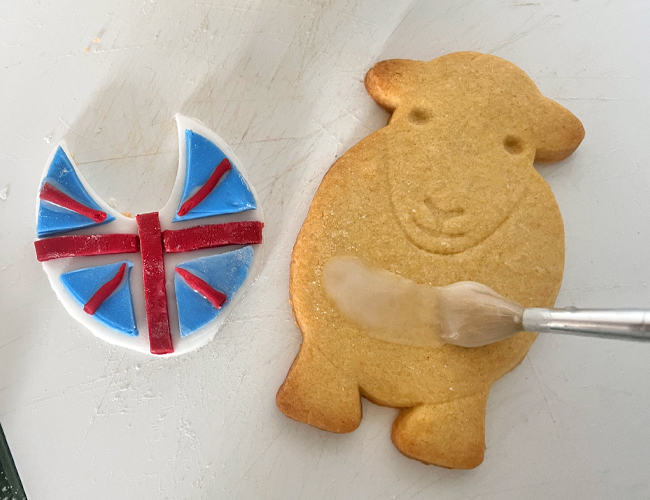
For the Union Jack's final layer, gently roll some red icing in-between your hands to create thin strands of icing, think strawberry laces. Place these diagonally across your blue triangles to finish your Union Jack design.
- Step 10
Now you need to stick the Union Jacks to Herdy's body. Take a generous amount of your icing glue and brush a layer onto Herdy's body, then carefully lift your icing into place. Leave for 10 minutes or until the glue is fully set.
- Step 11
For the final touch. Take a paintbrush with a little water and brush over the icing, this will remove any excess icing sugar and make the colours pop. Finally, your Coronation cookies are ready to eat!
Freatured Product
Herdy Cookie Cutter

